Intro
My car is used more for fun and some racing, so I do not care much for car show quality stuff. But you can use this idea and take it to the next level with carbon-fiber, nicer mountings, and so on. So if you're planning to build something similar, feel free to elaborate on it as much as you want.
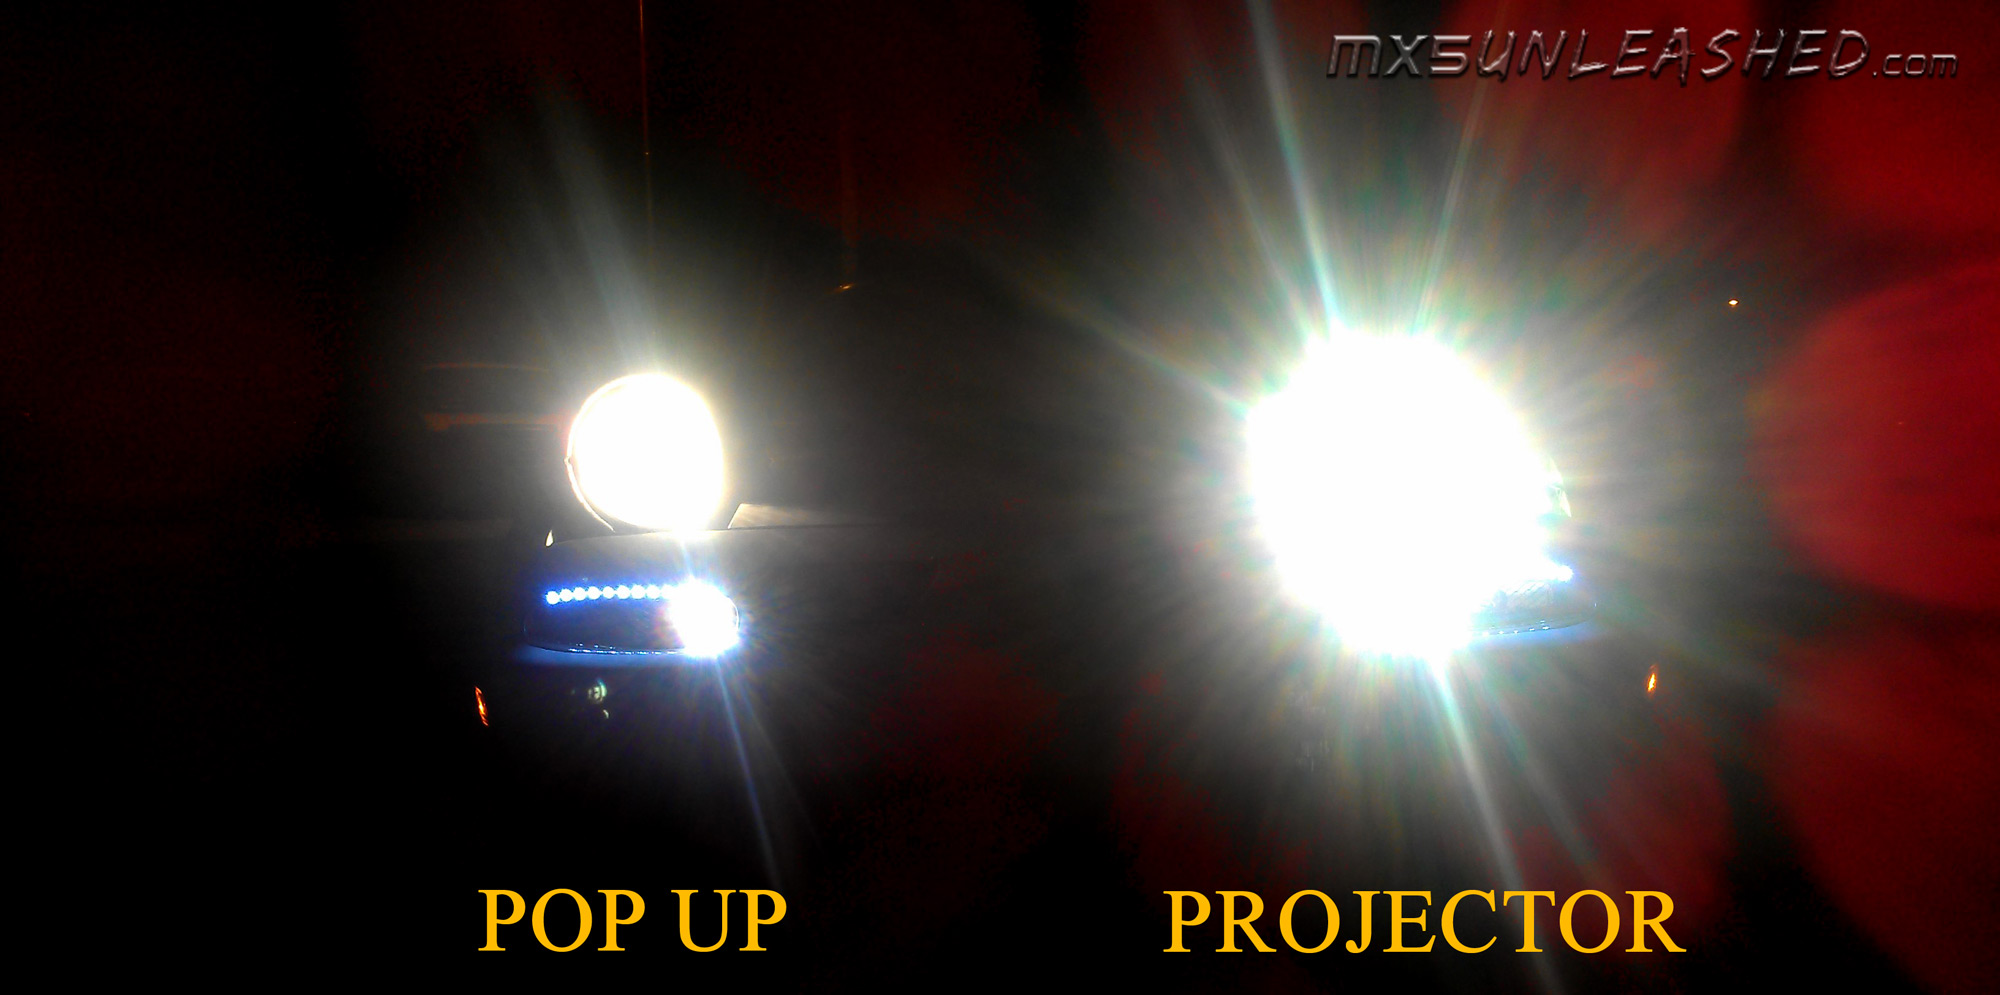
The nice thing about projector lights is that not only are they a bit brighter, they also have a very fine cut off line which makes them easy to align, so that the beam of light shoots almost exactly as the stock lights do and does not blind other drivers. They are also much lighter and more aerodynamical, though maybe not as cool as pop ups ;)
Also, do one at a time so that you can align the light beam with your stock lights first, this way you wont be shooting light into peoples' eyes.
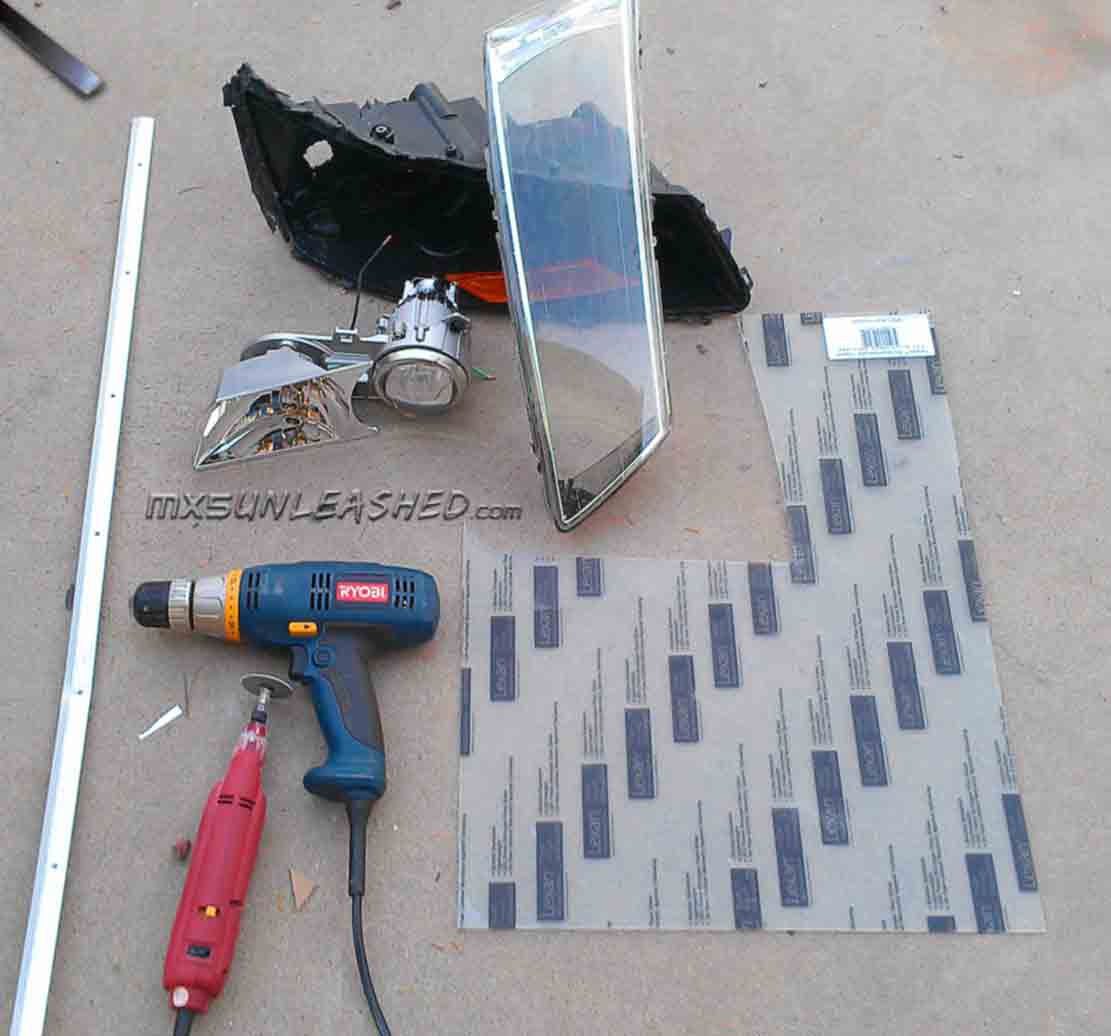
Here is what you will need for this conversion (obviously if you have a better tools, that's fantastic):
• 2006 Hyundai Sonata headlights - gut the light element out of the plastic cover. This is the most difficult part of the whole conversion. (You can check online if other years are interchangeable and use those.) Ebay or swap meets.
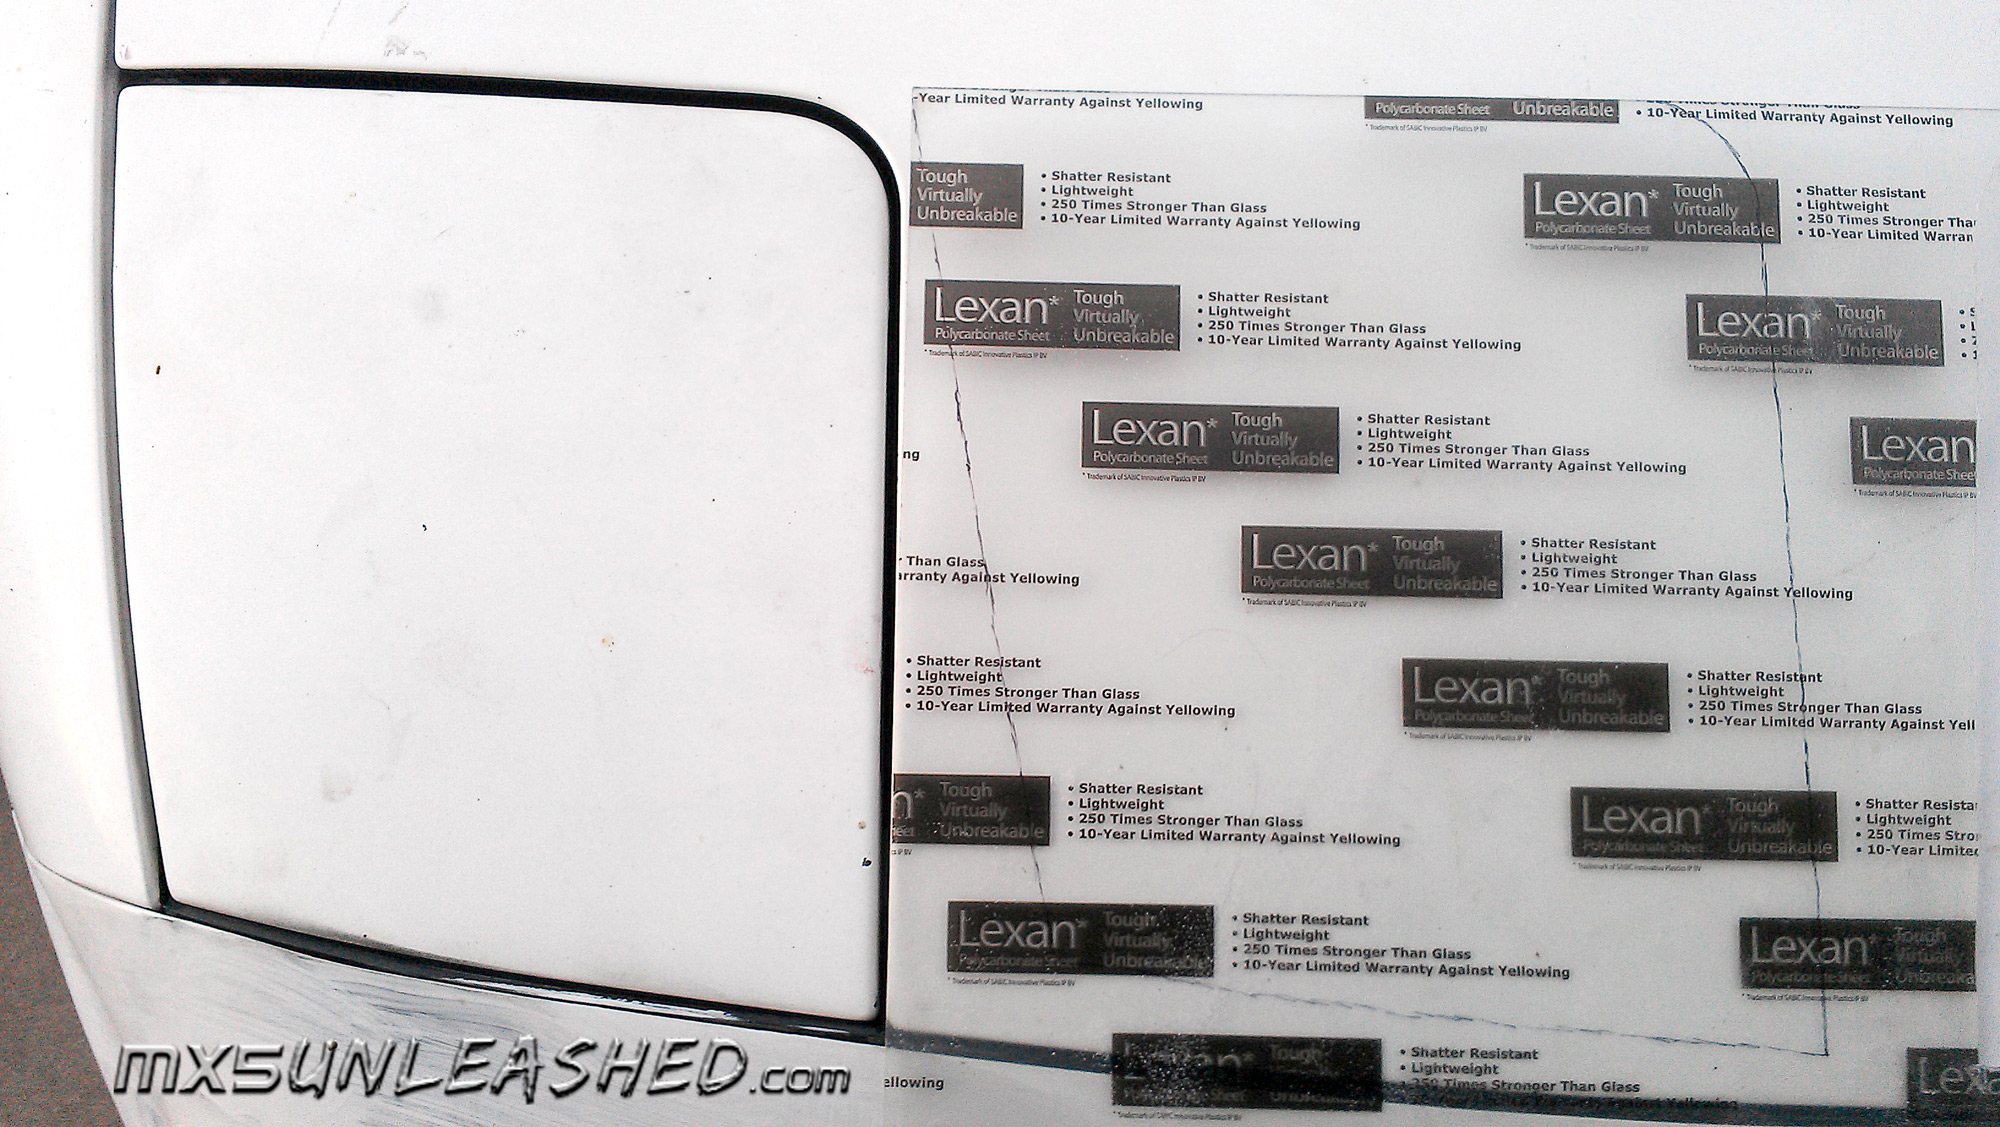
• Lexan sheet of Polycarbon. Polycarbon is the best since it's hard to scratch and does not fade very fast. Also it can take much higher temperatures then plexiglass. Home Depot
• Small sheet of thin glass. Home Depot
• A strip of aluminum for L brackets that hold the Polycarbon. Ace Hardware
• A strip of steel flat beam. Ace Hardware
• A drill
• A glass cutter
• And a Dremel tool
When you get your light assemblies out, connect them to the 12V source to make sure the light bulbs work. |
click to enlarge |
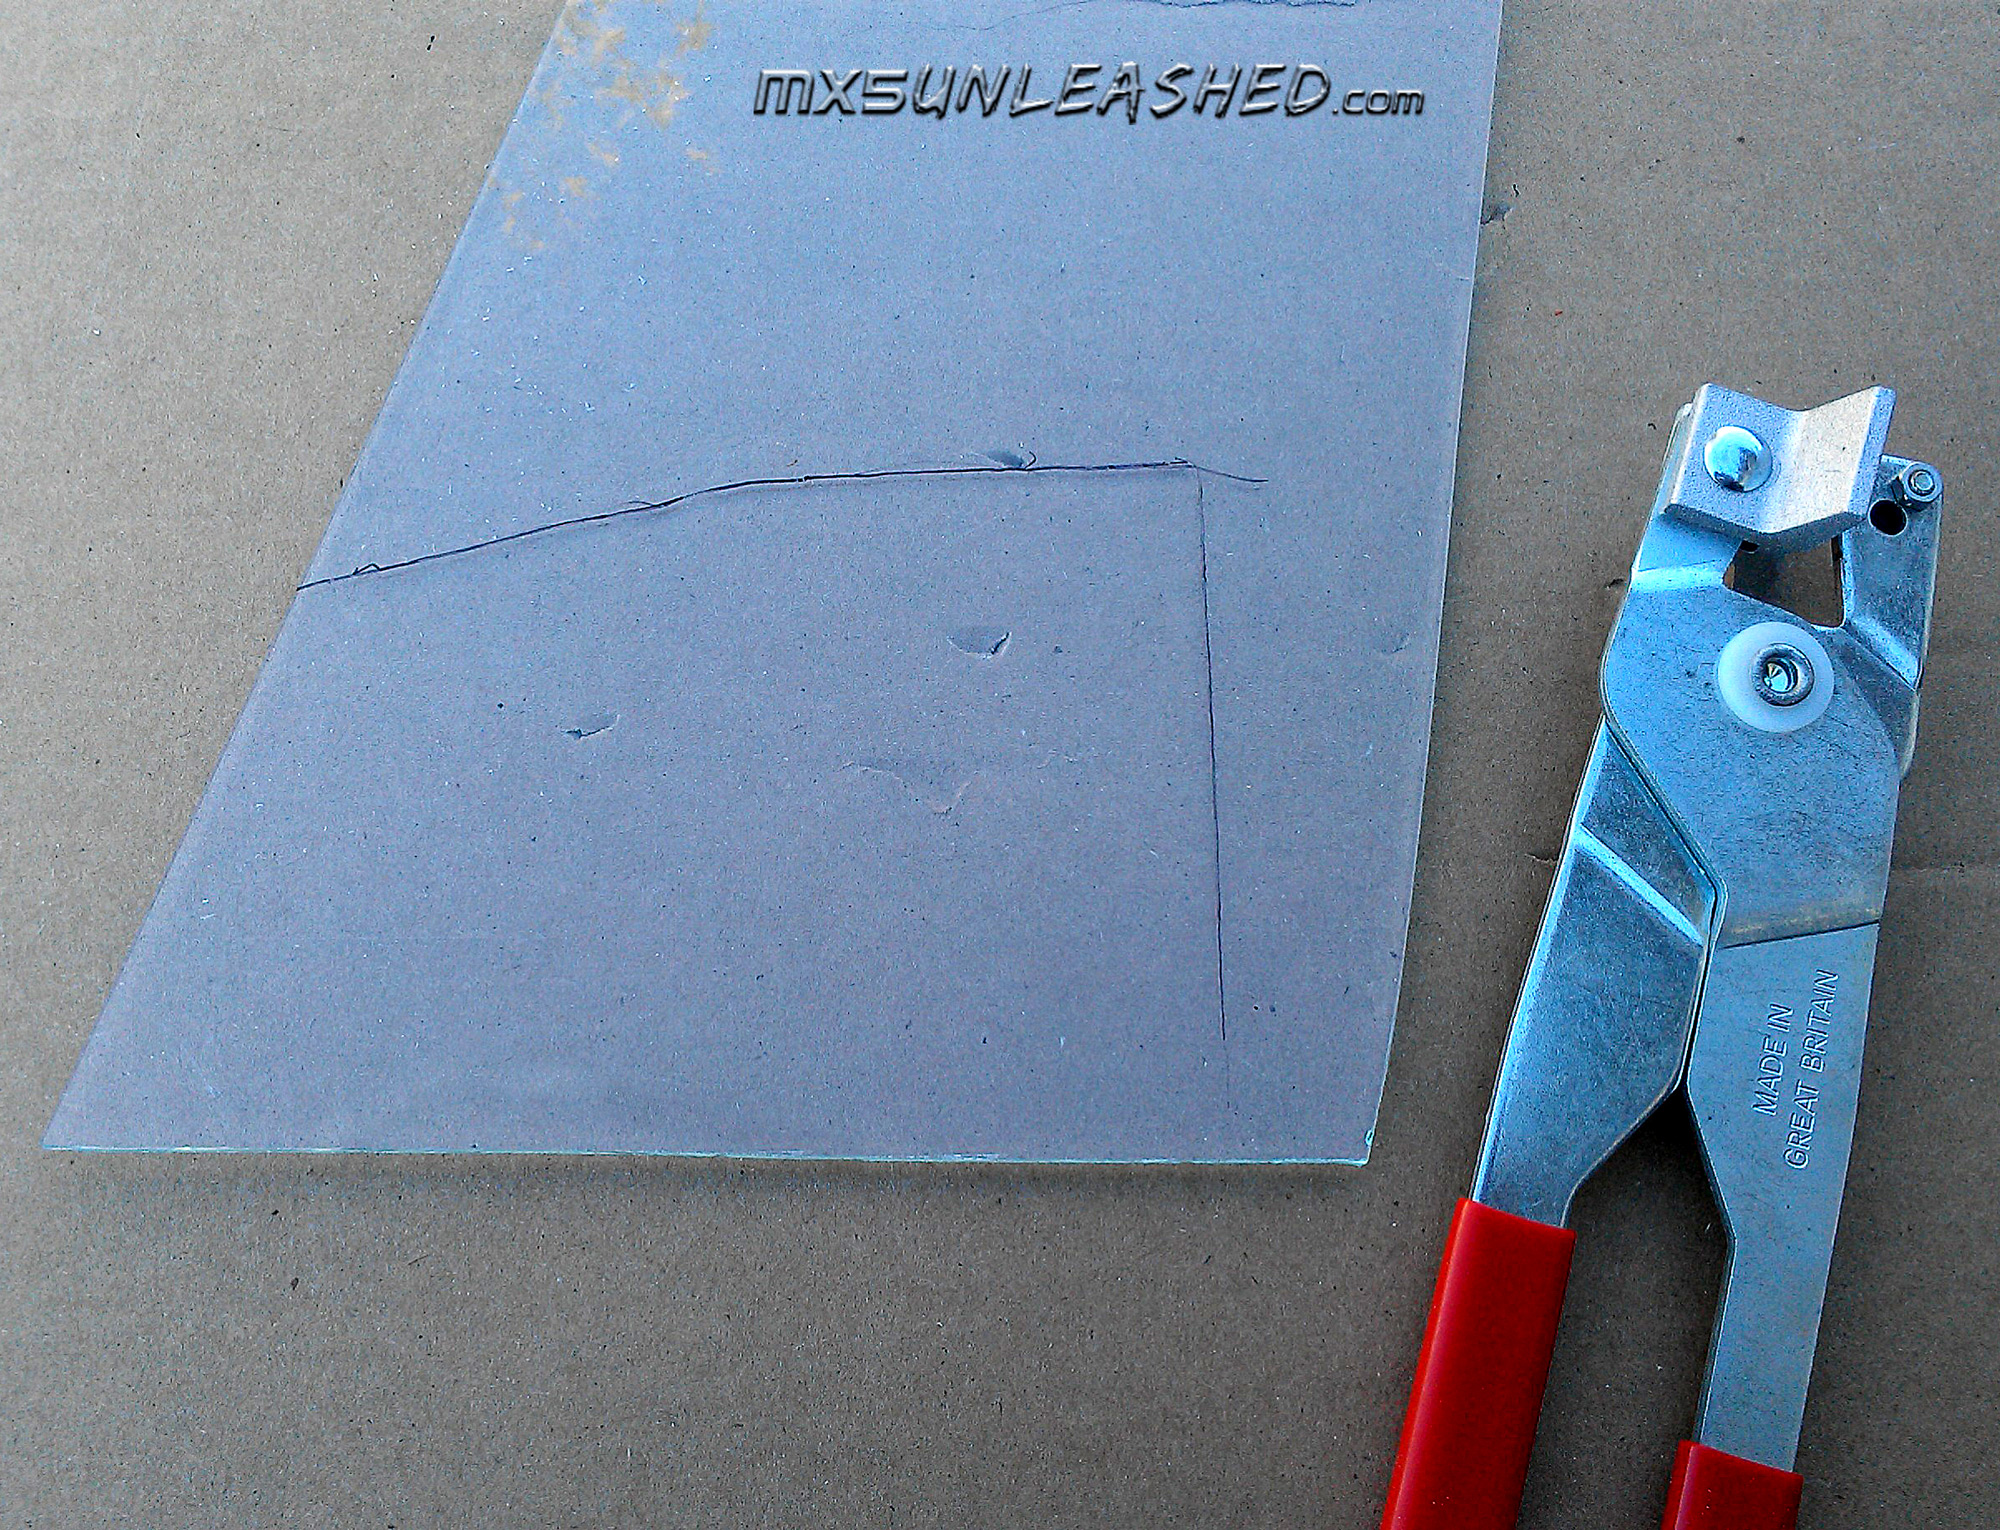
Now place the polycarbon over the headlight cover and trace it. The trace can be close to the bumper and the body panel but give yourself at least 1/8" away from the hood, since the hood goes up and down you want some safety space. |
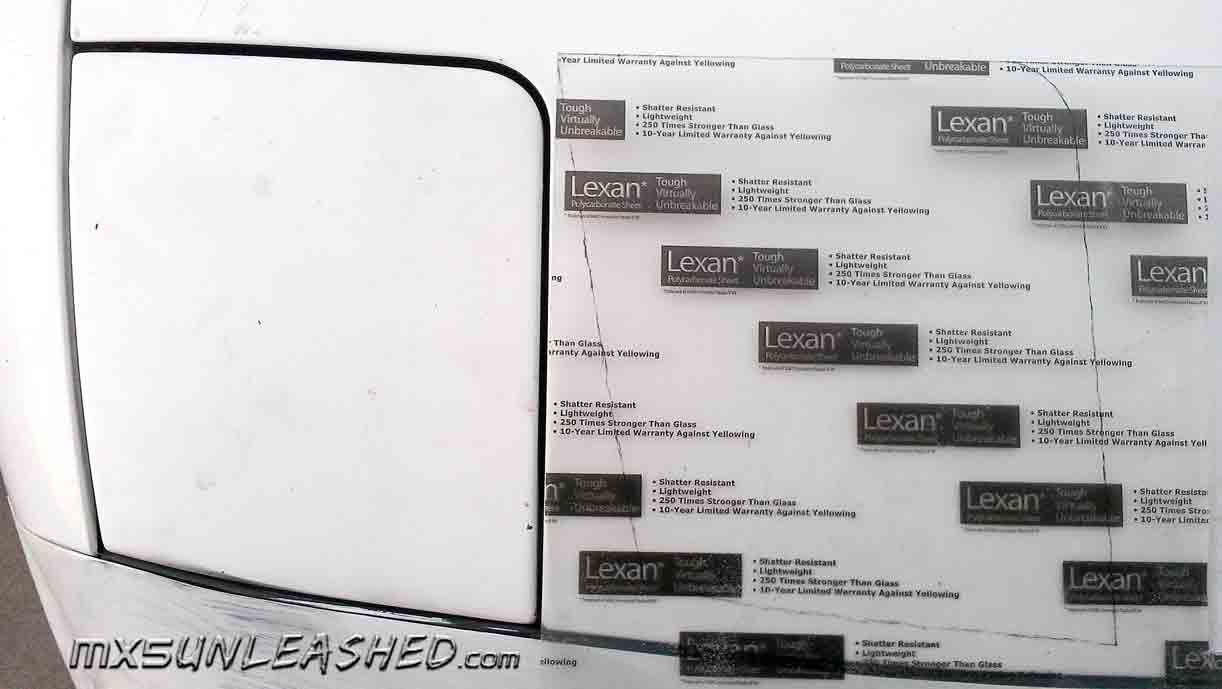
click to enlarge |
Cut the shape out with the Dremel tool. Nice steel blades work great. Keep the protective sheet as long as you can to avoid accidental scratches and nicks. Smooth the edges with sand paper. |
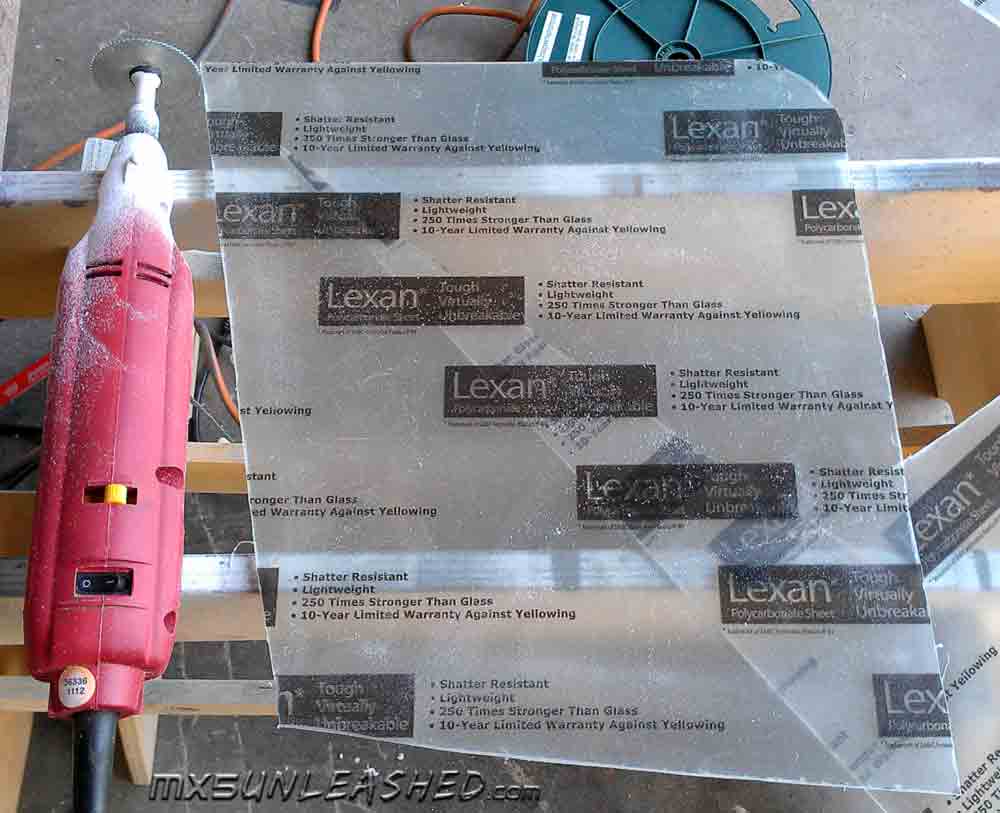
click to enlarge |
Remove headlight weather stripping. |
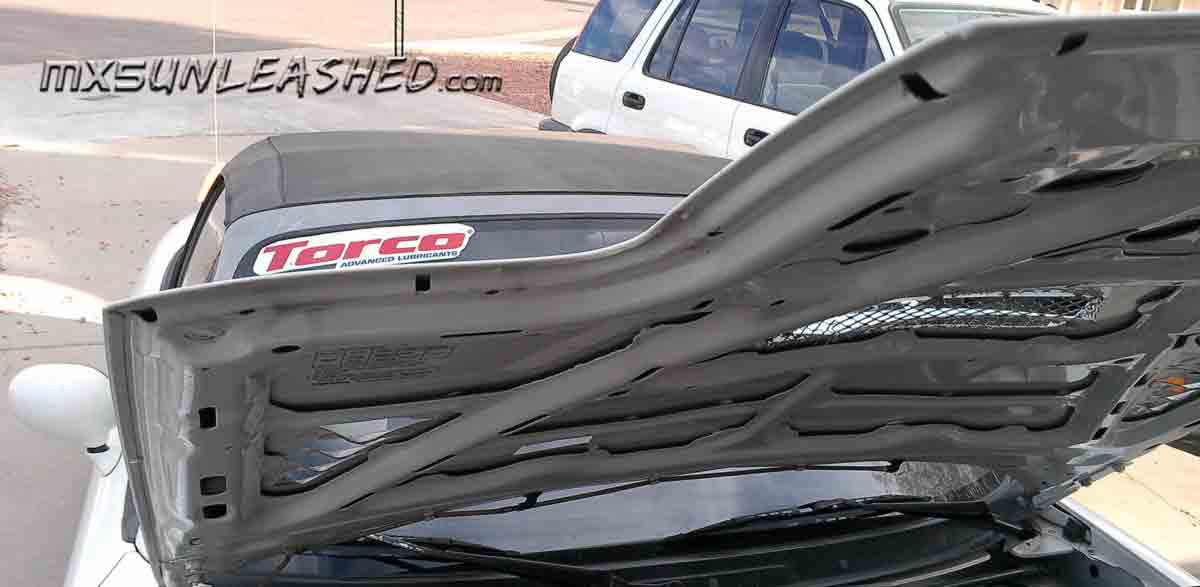
click to enlarge |
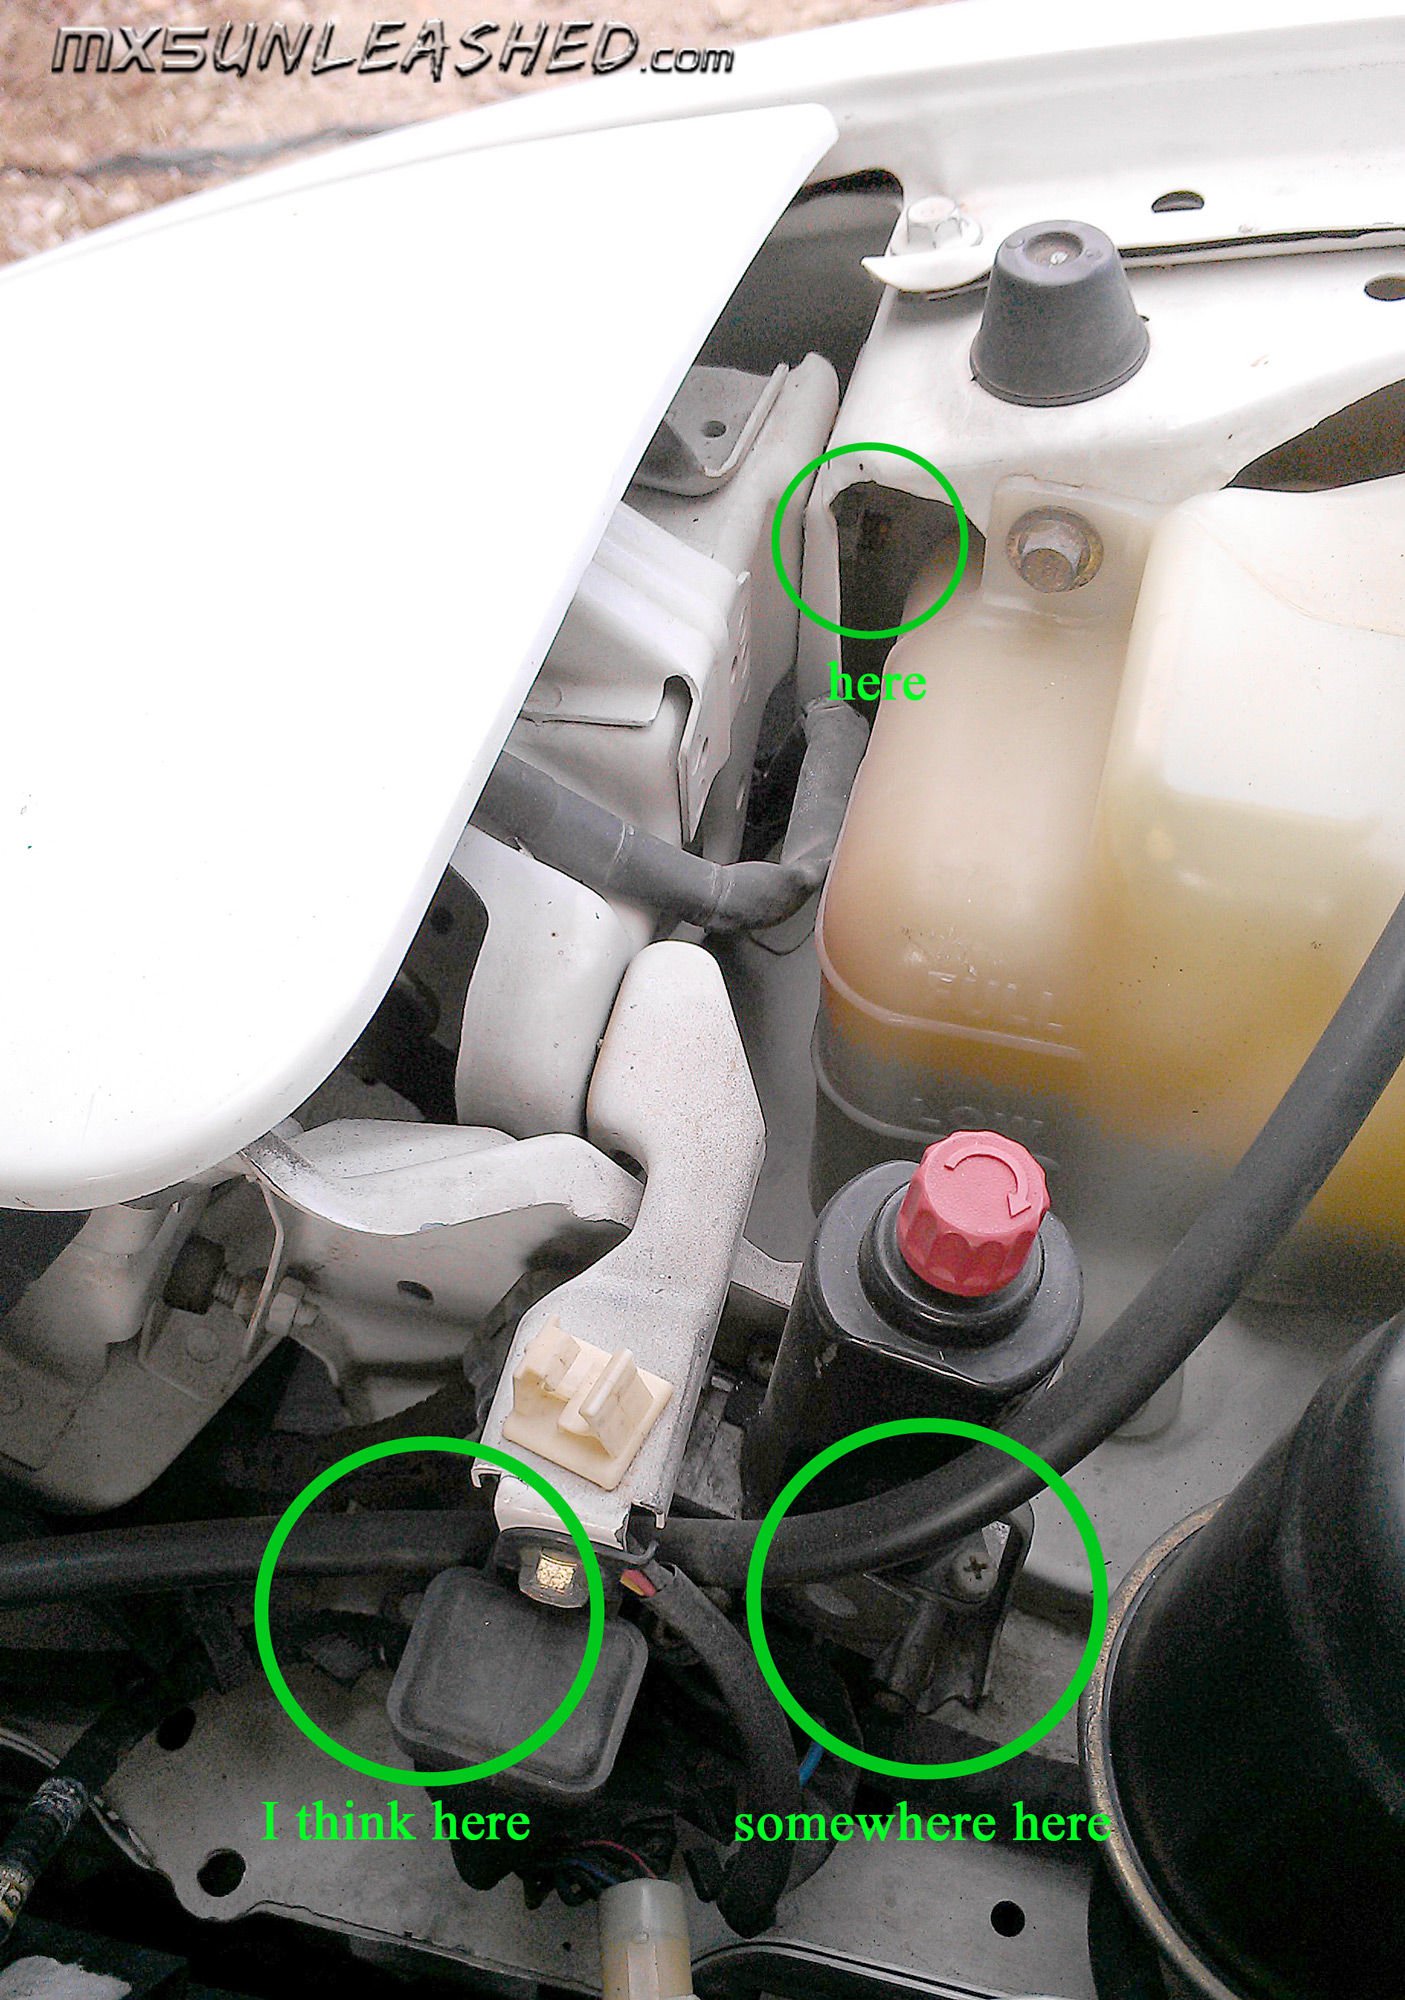
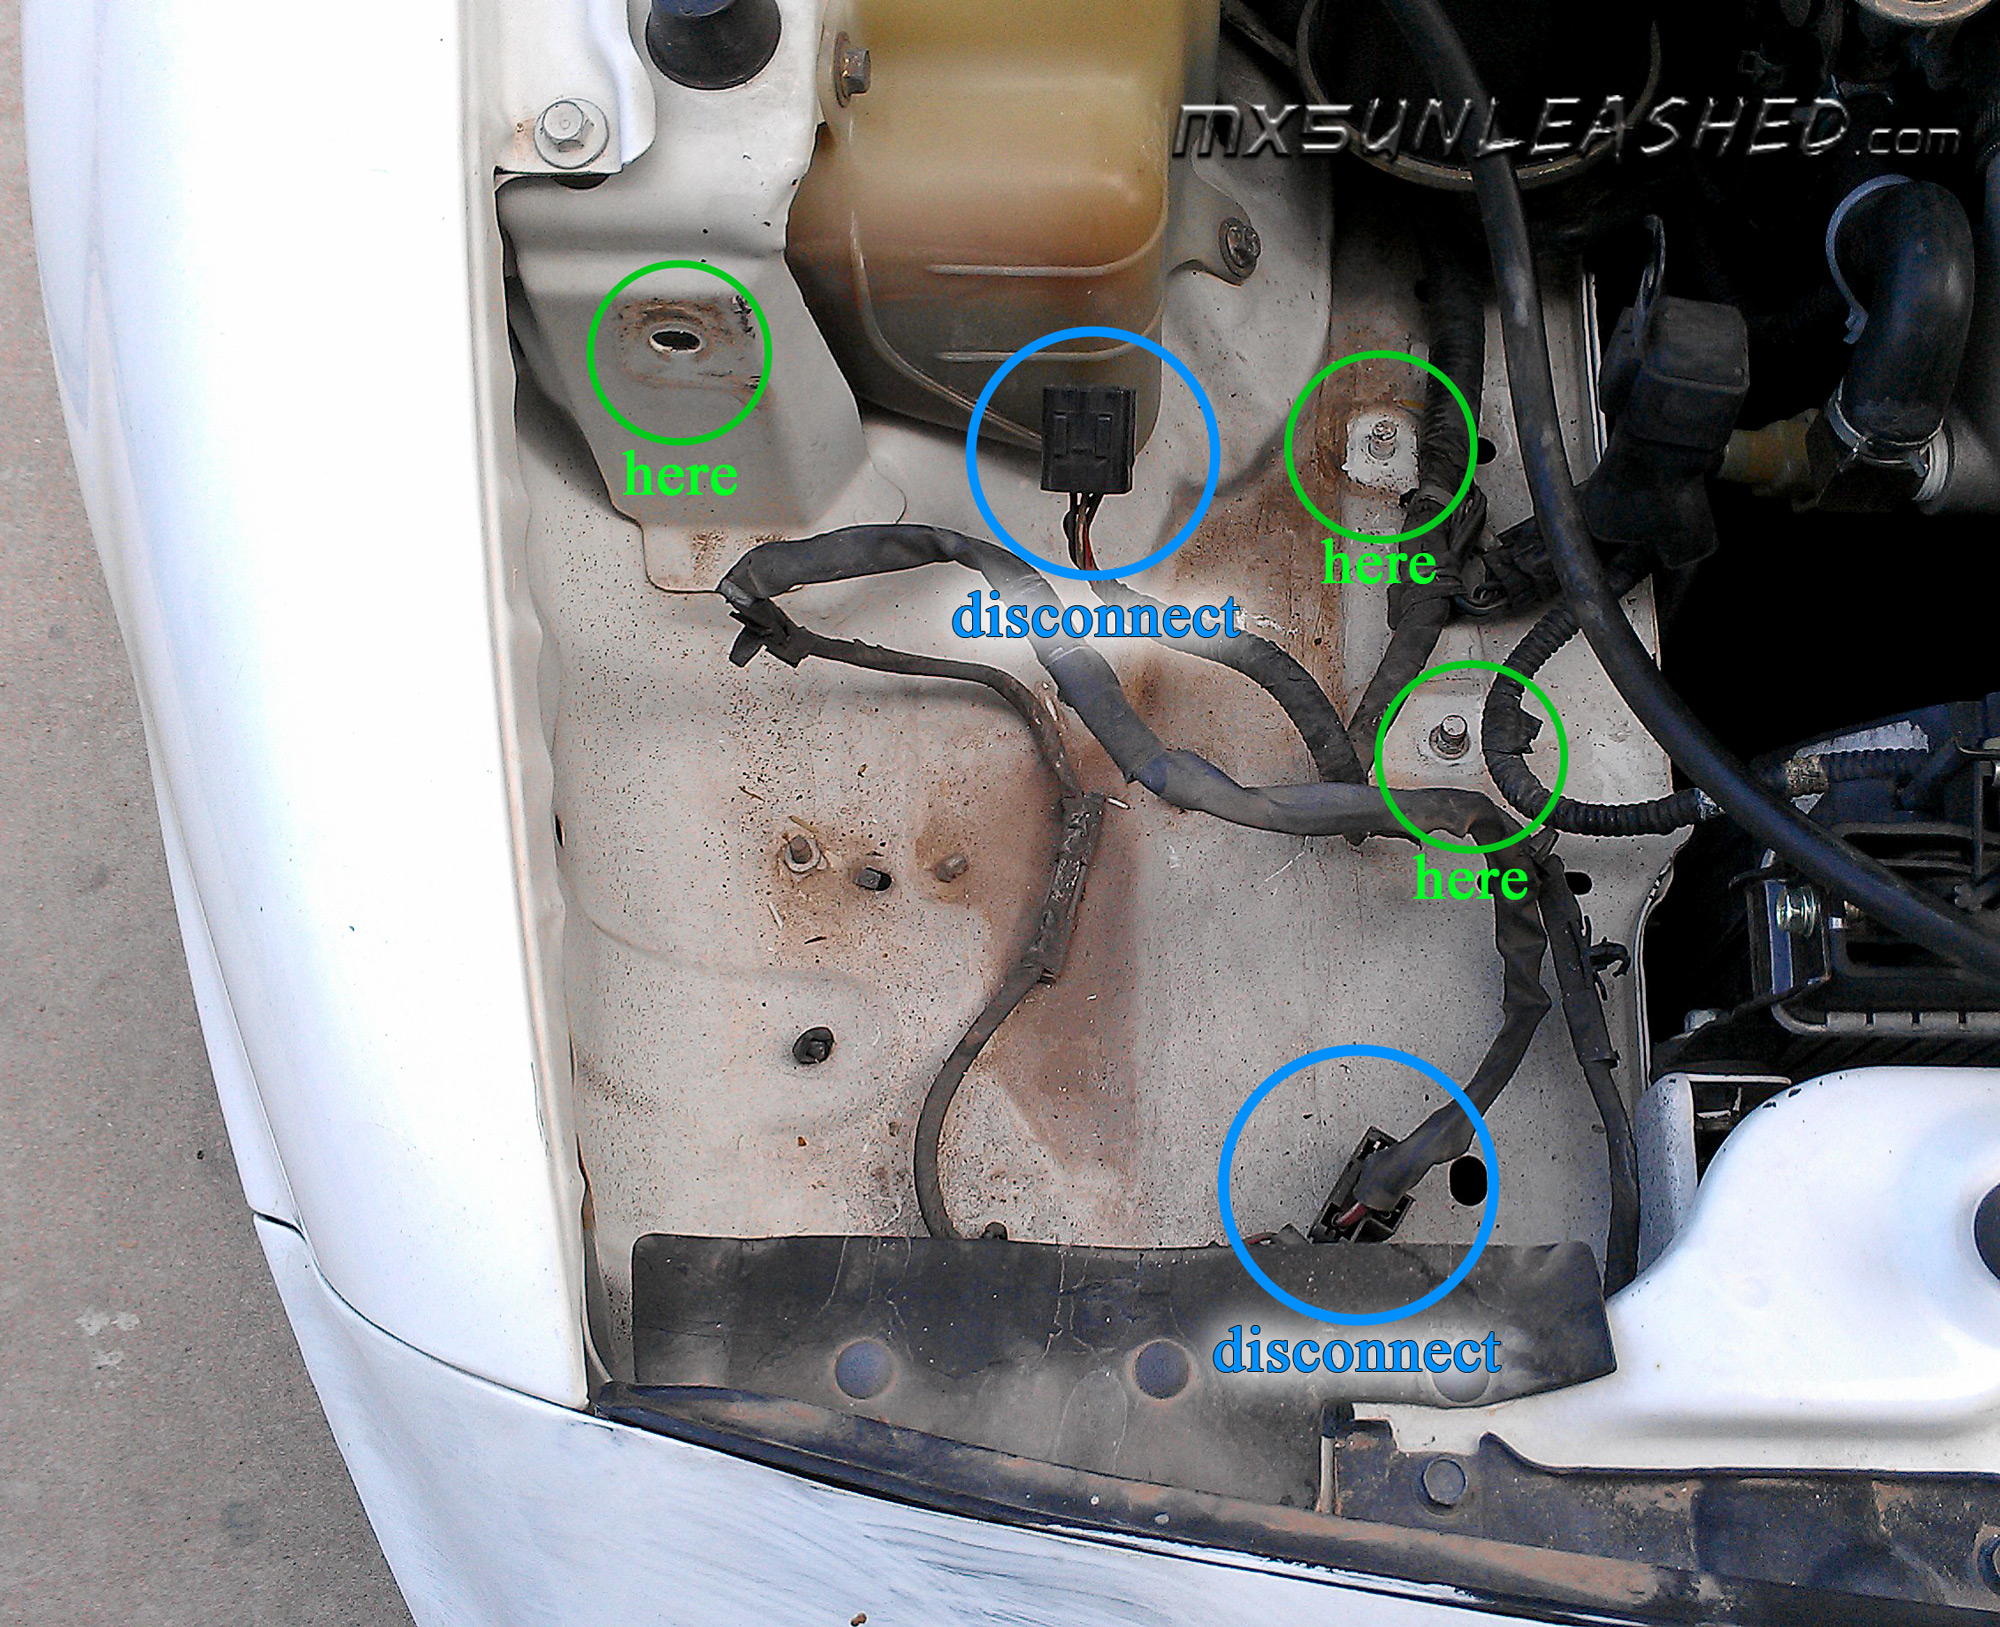
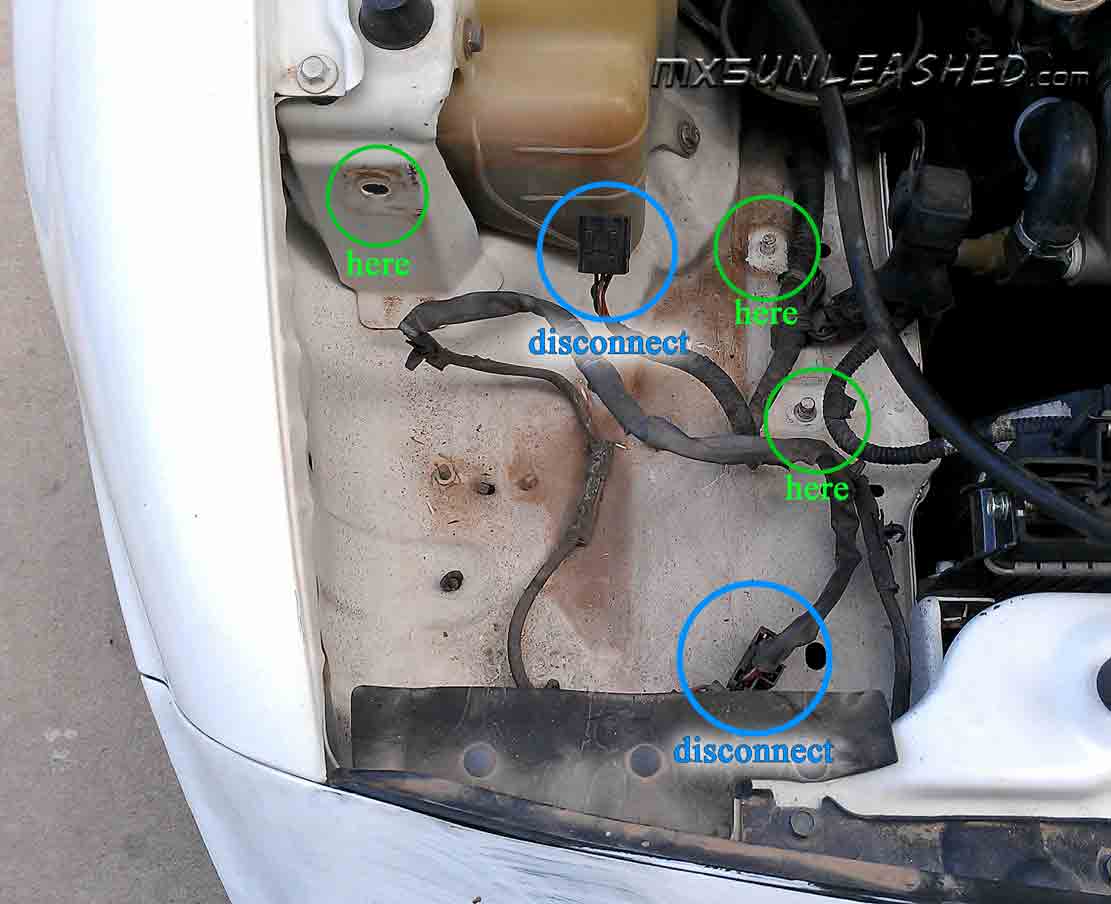
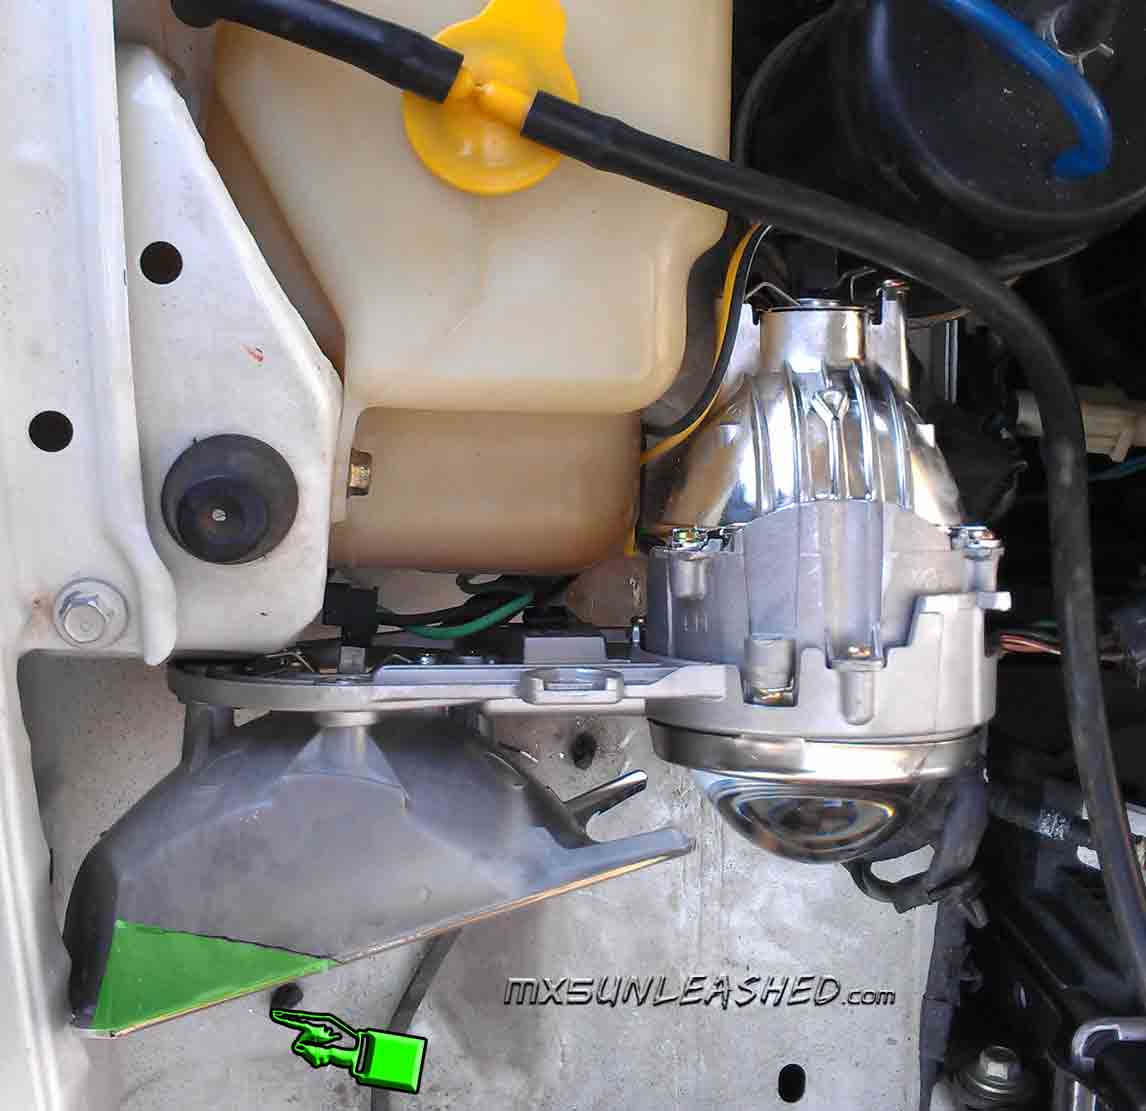
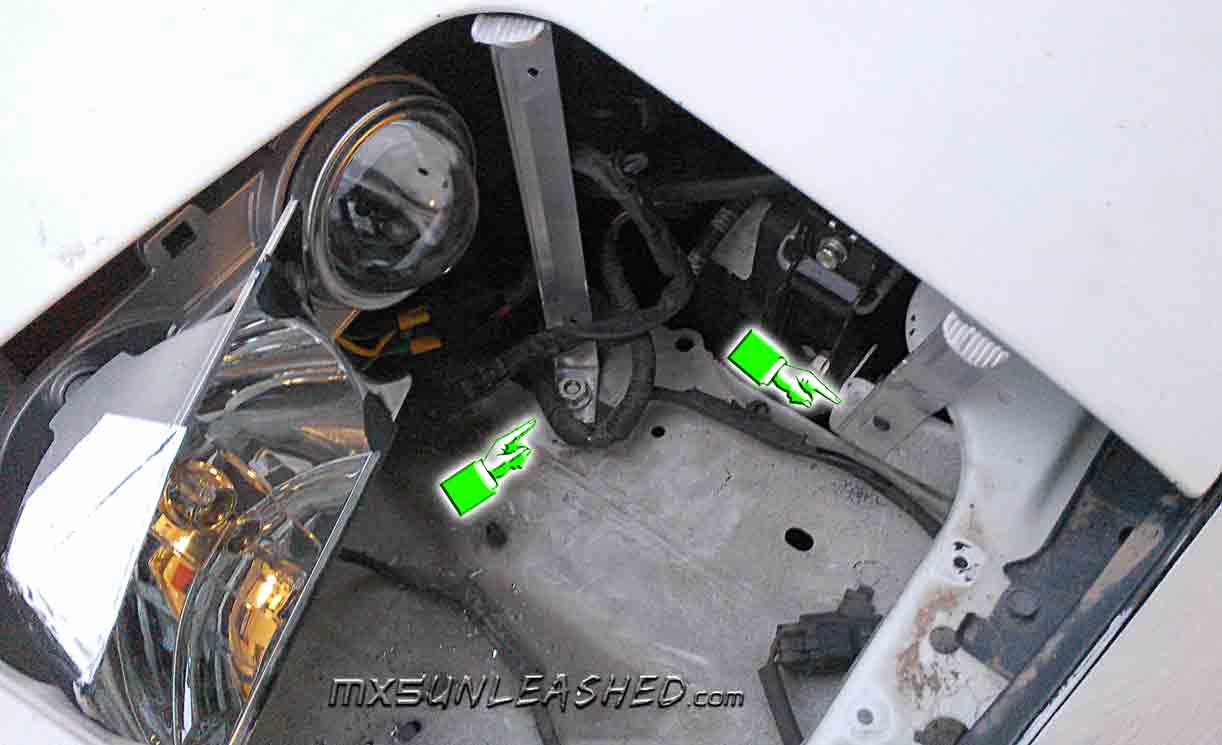
To remove the pop up light with the mechanism just undo 3 screws and 2 plugs, one for the lights and one for the pop up motor. Also remove the radiator overflow bottle for now. |
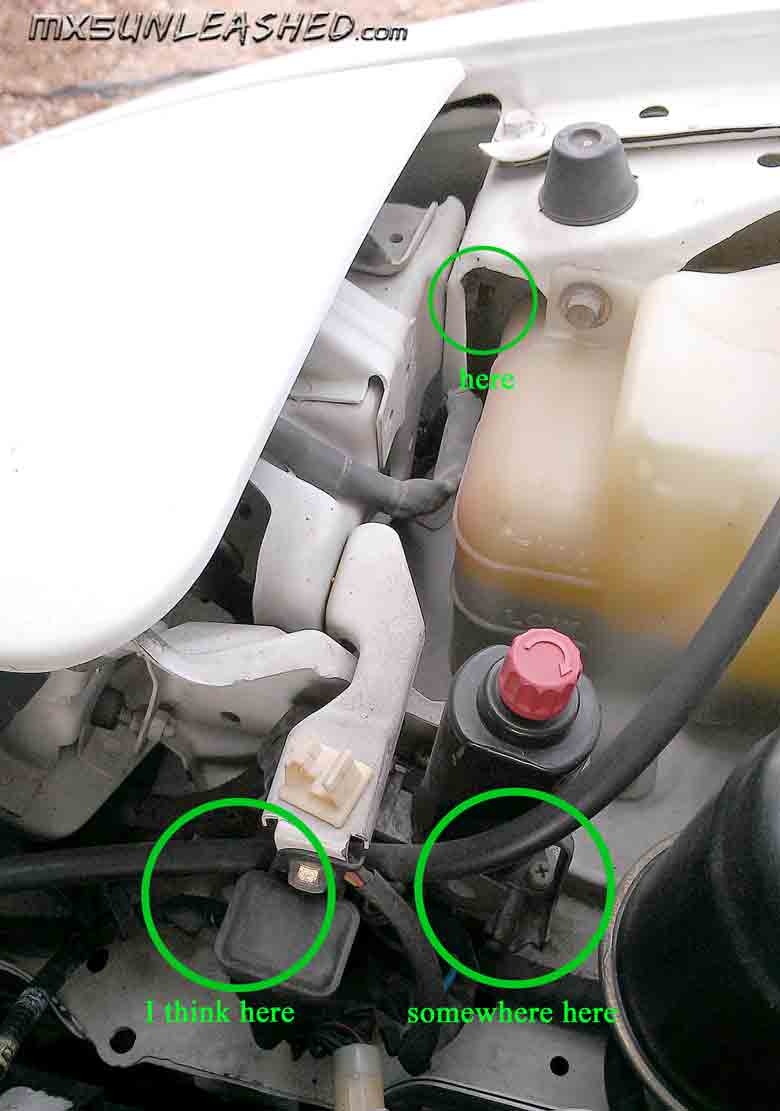
click to enlarge |
click to enlarge |
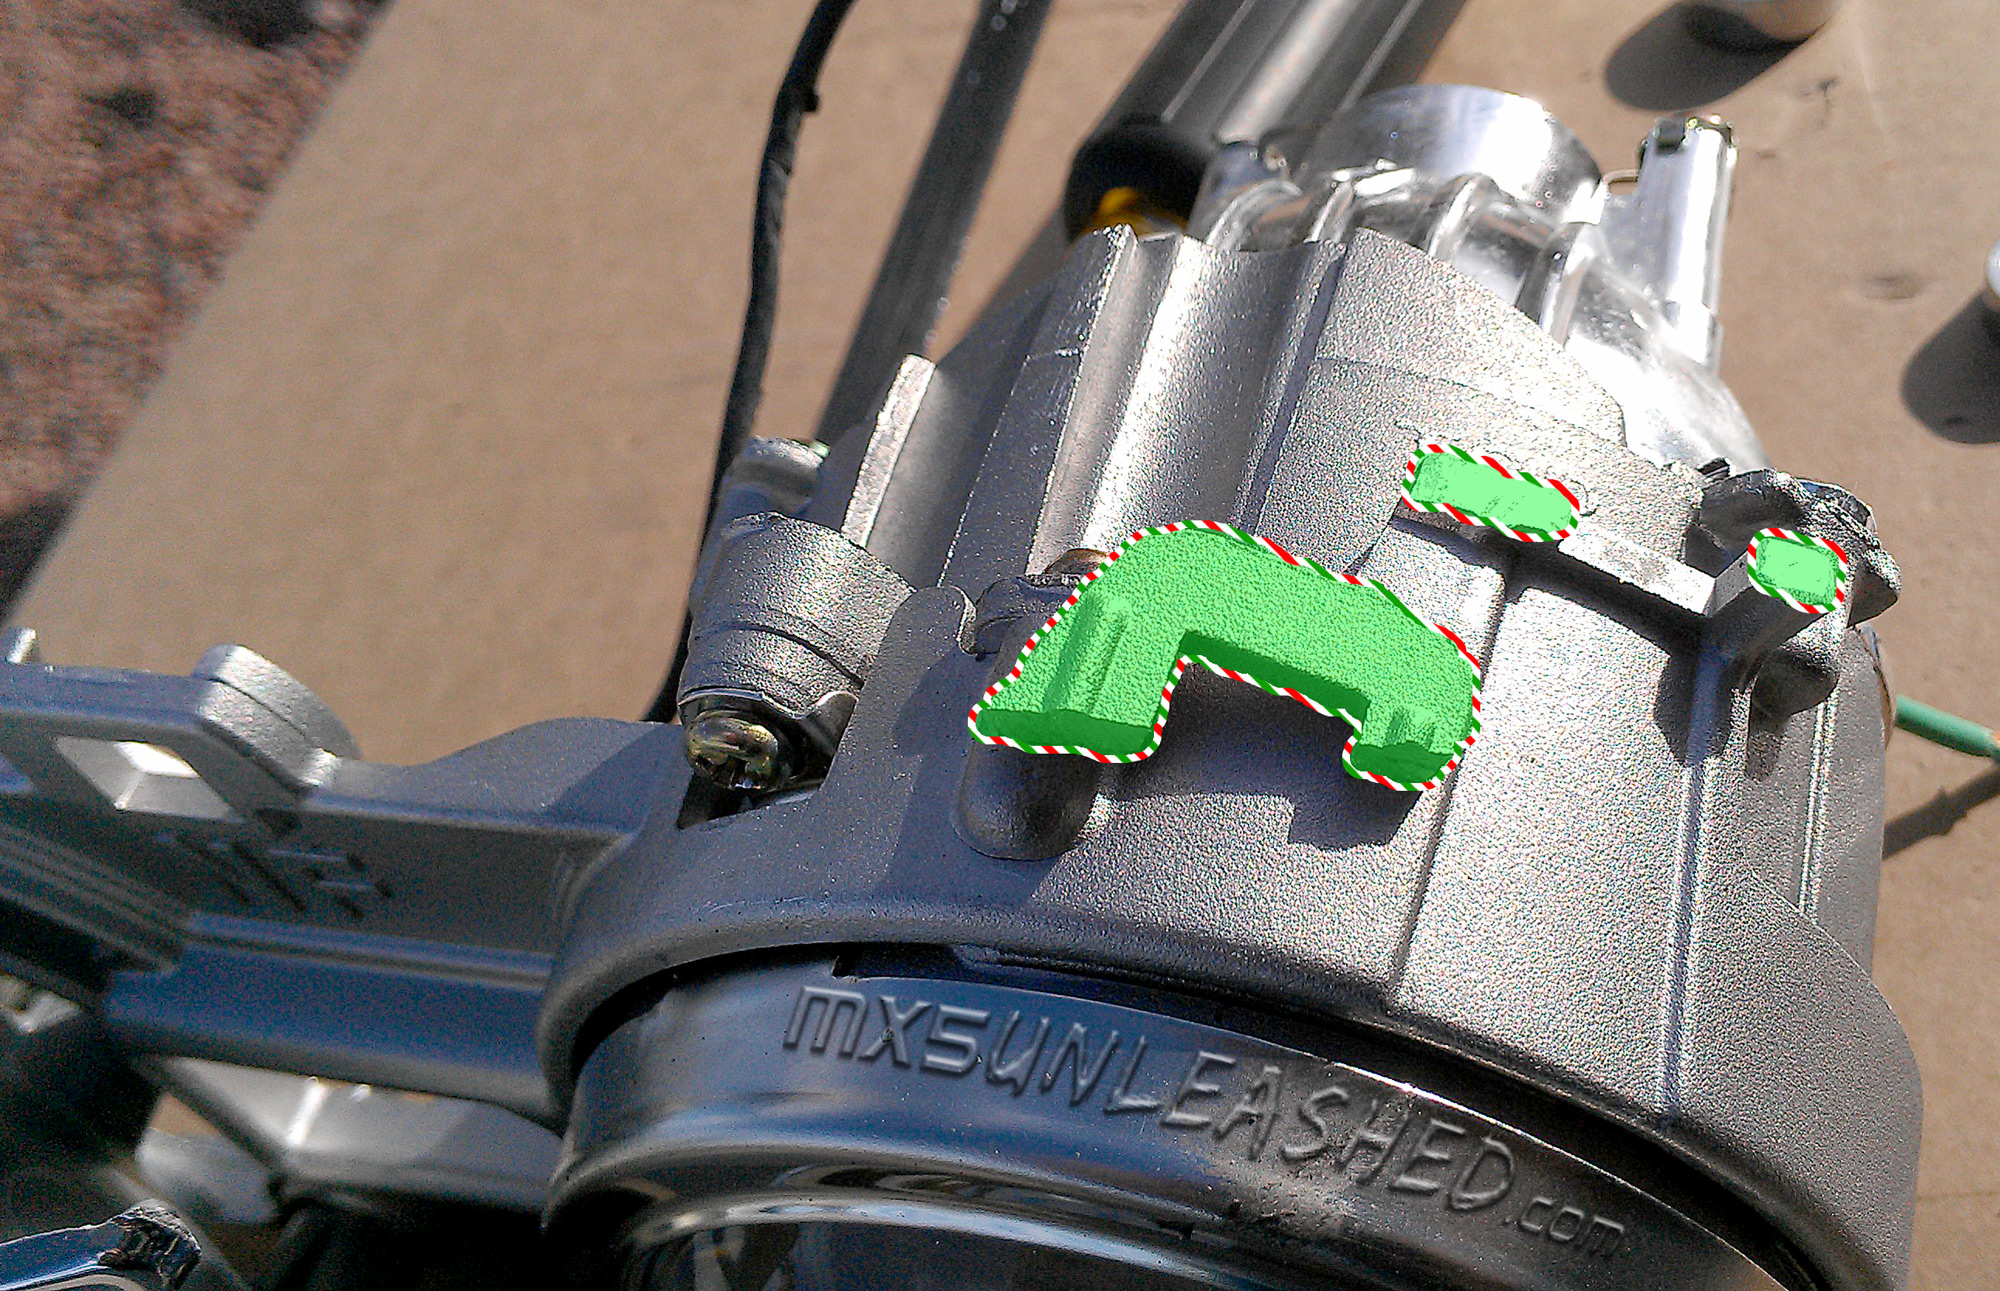
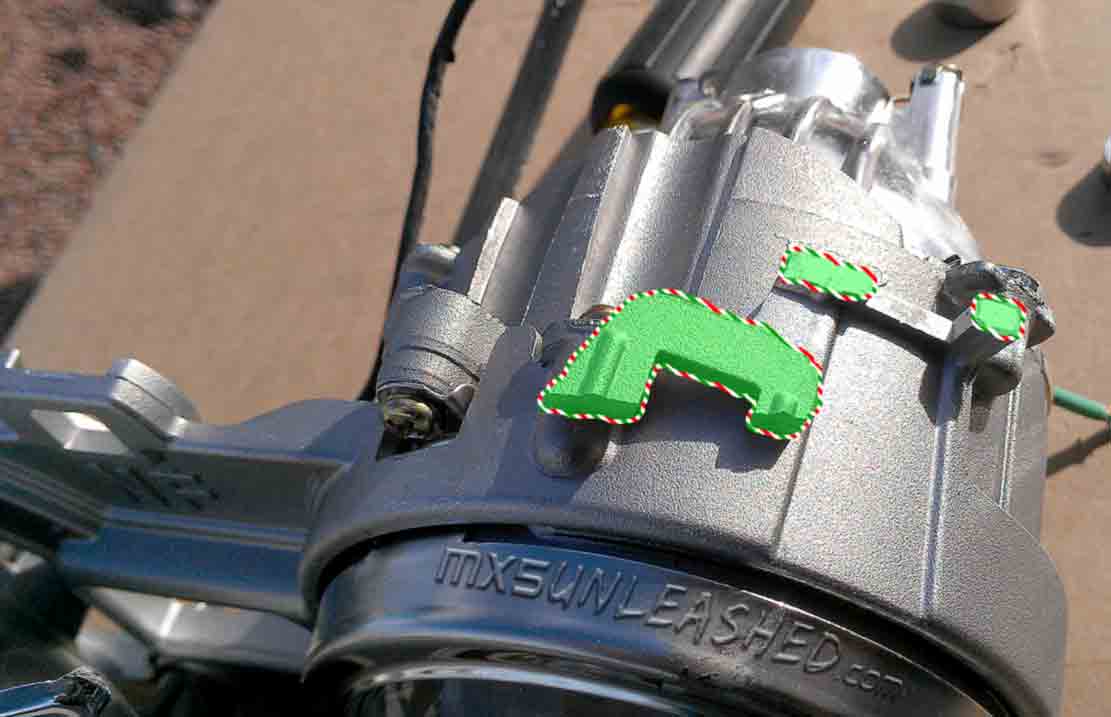
The original top mounting bracket needs to be trimmed off. |
click to enlarge |
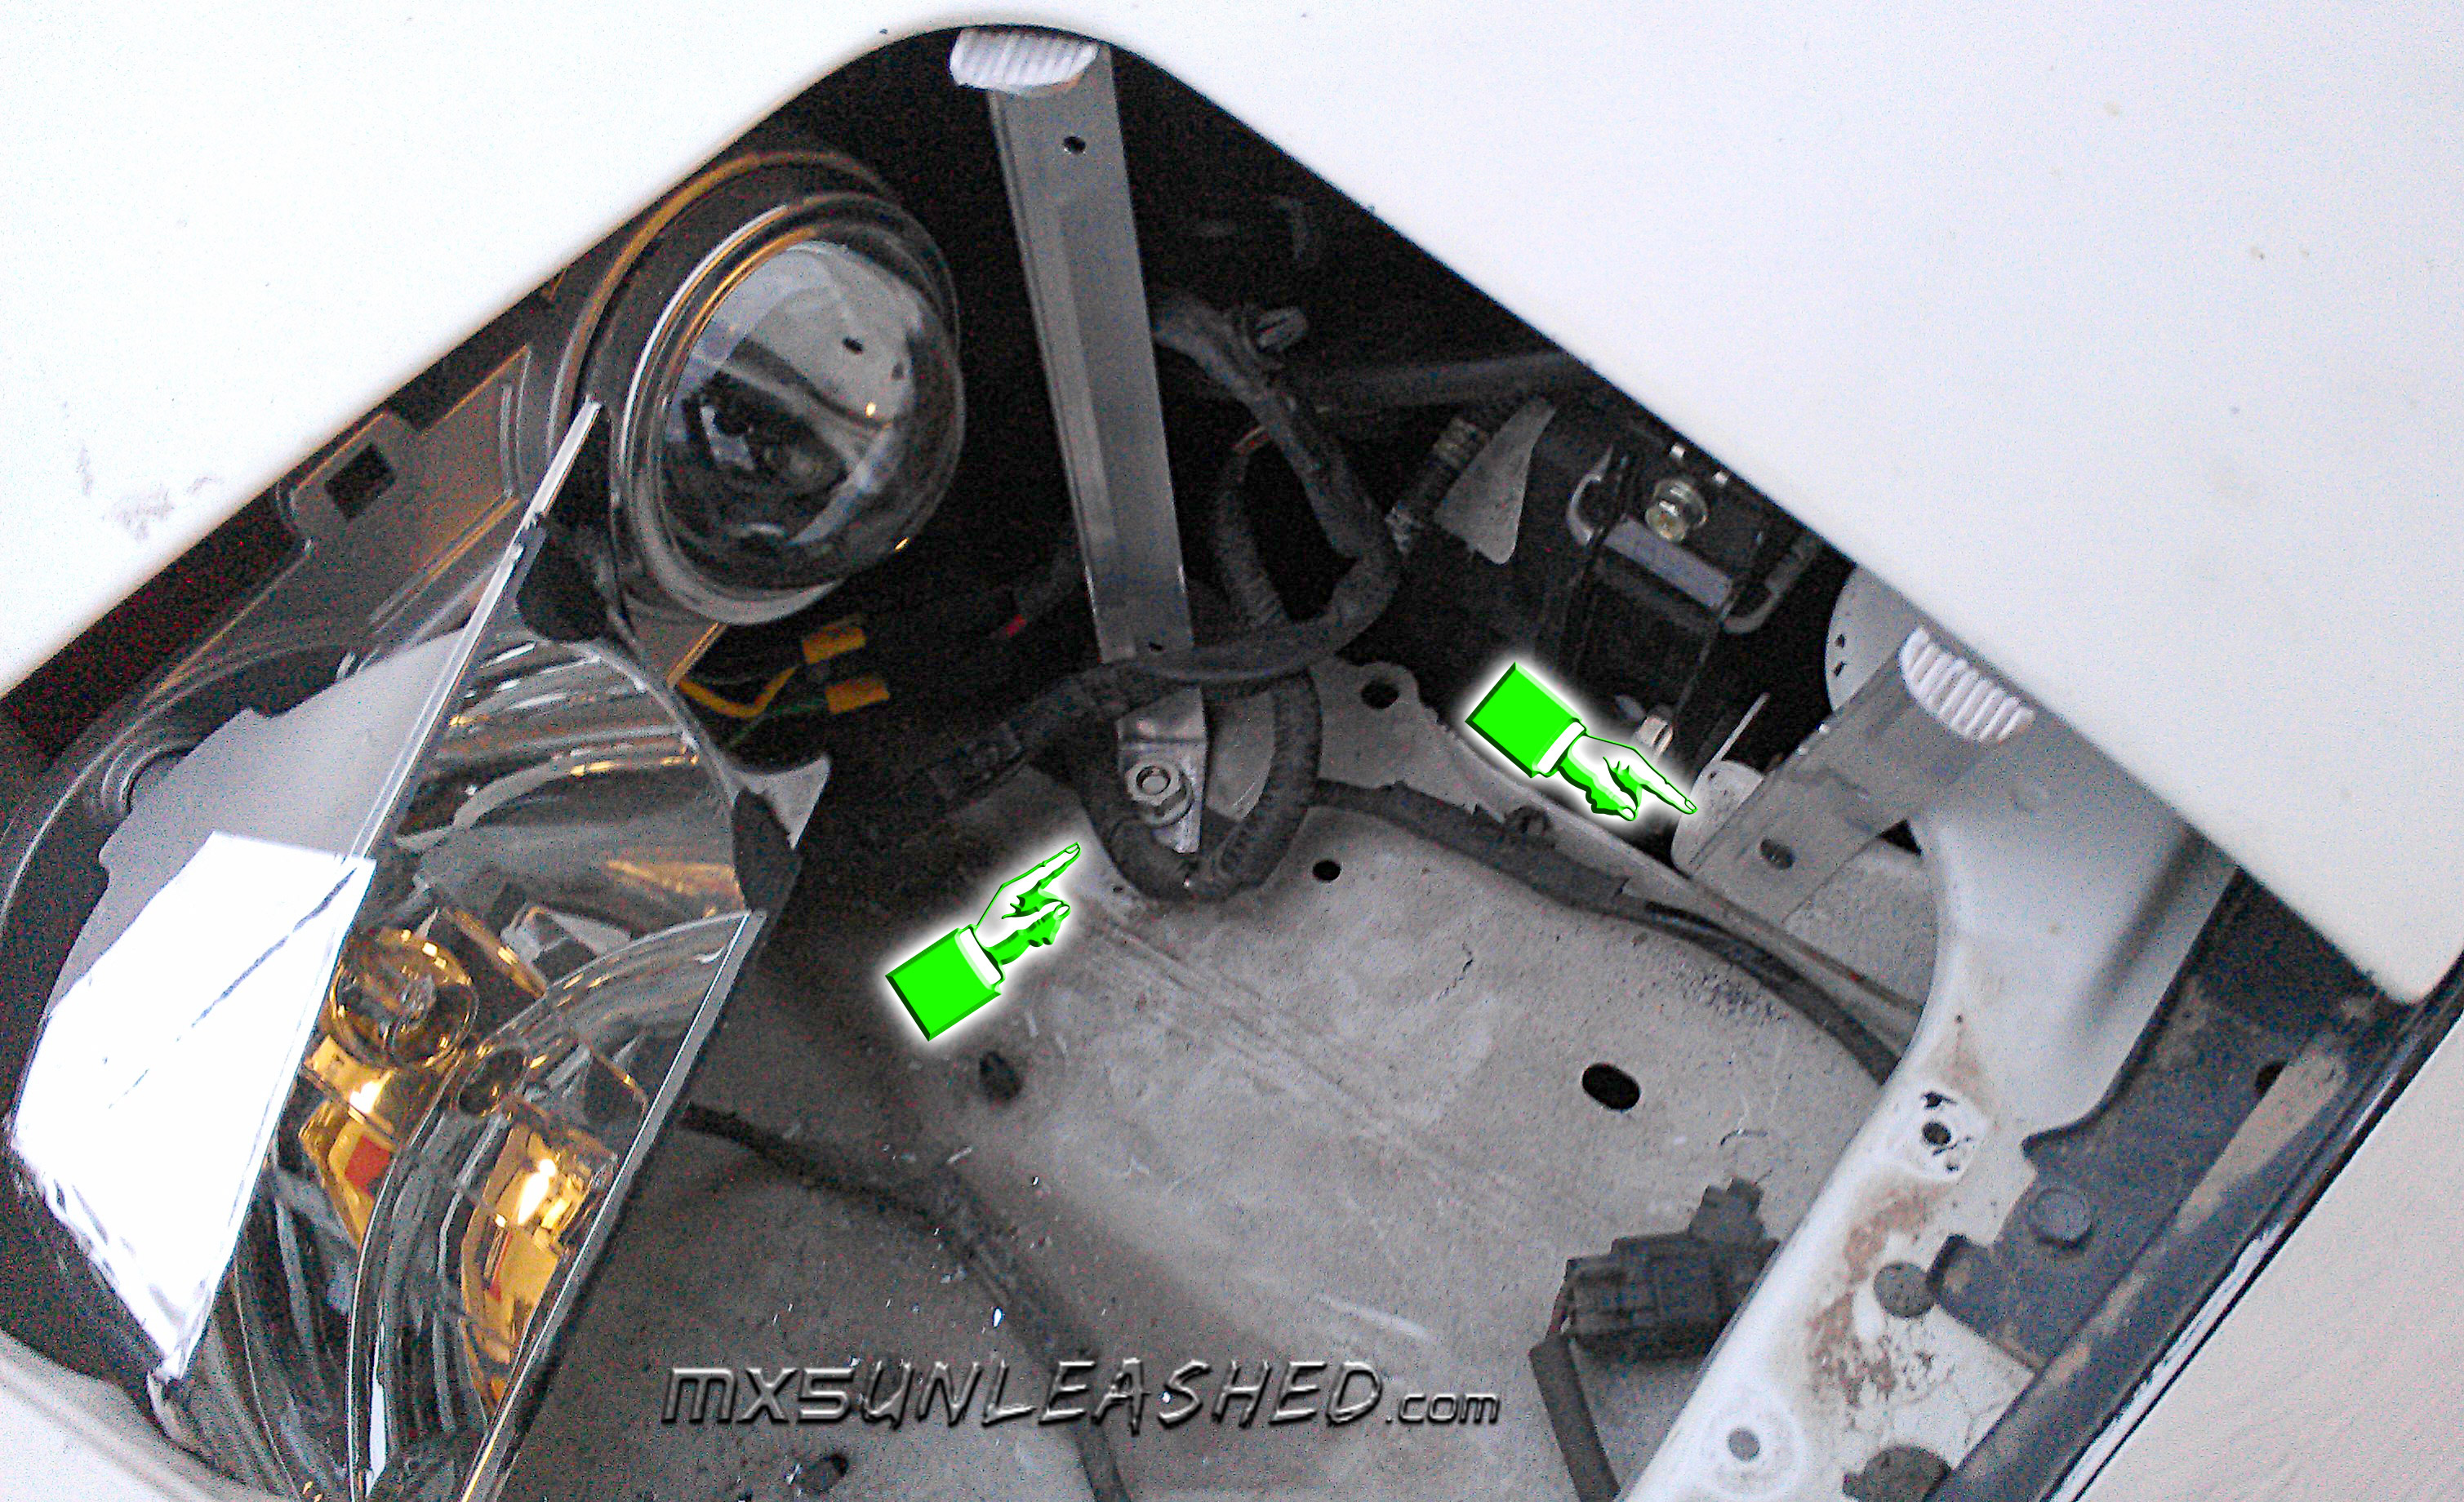
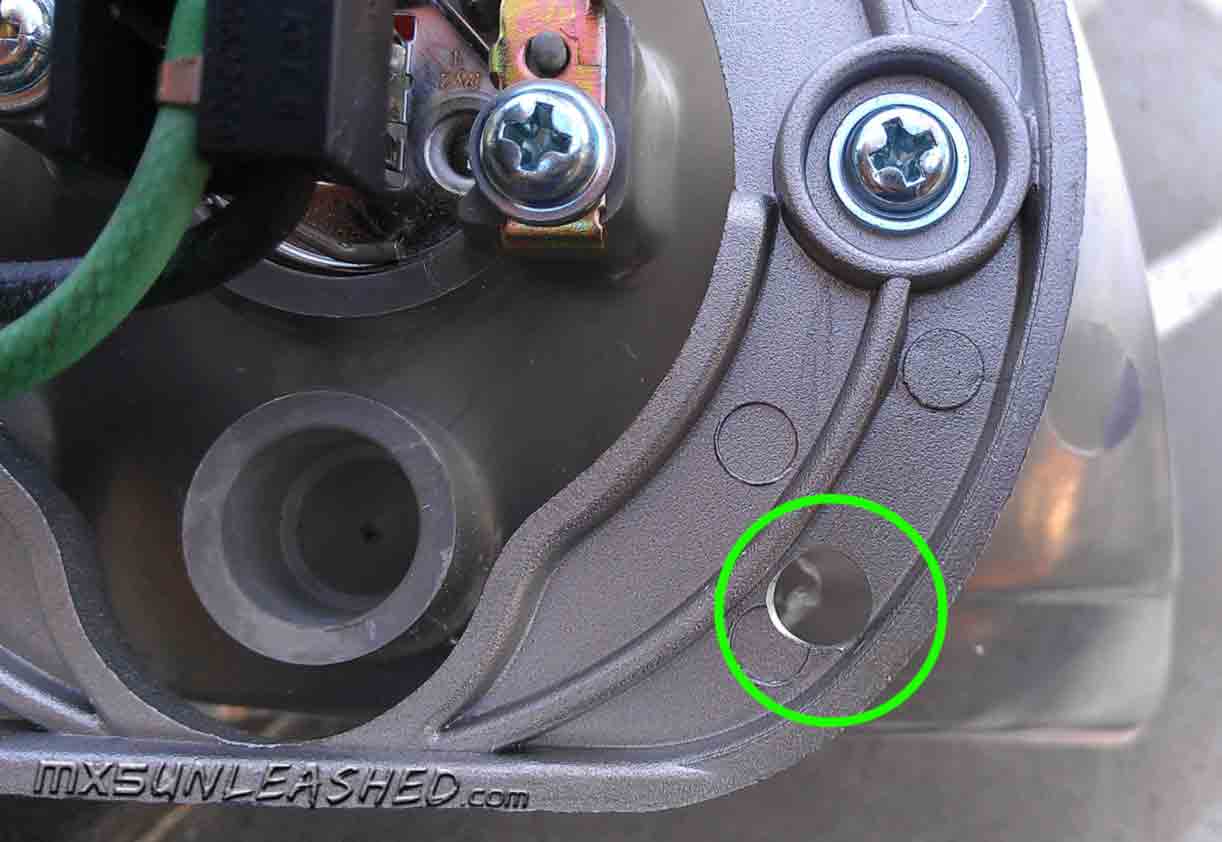
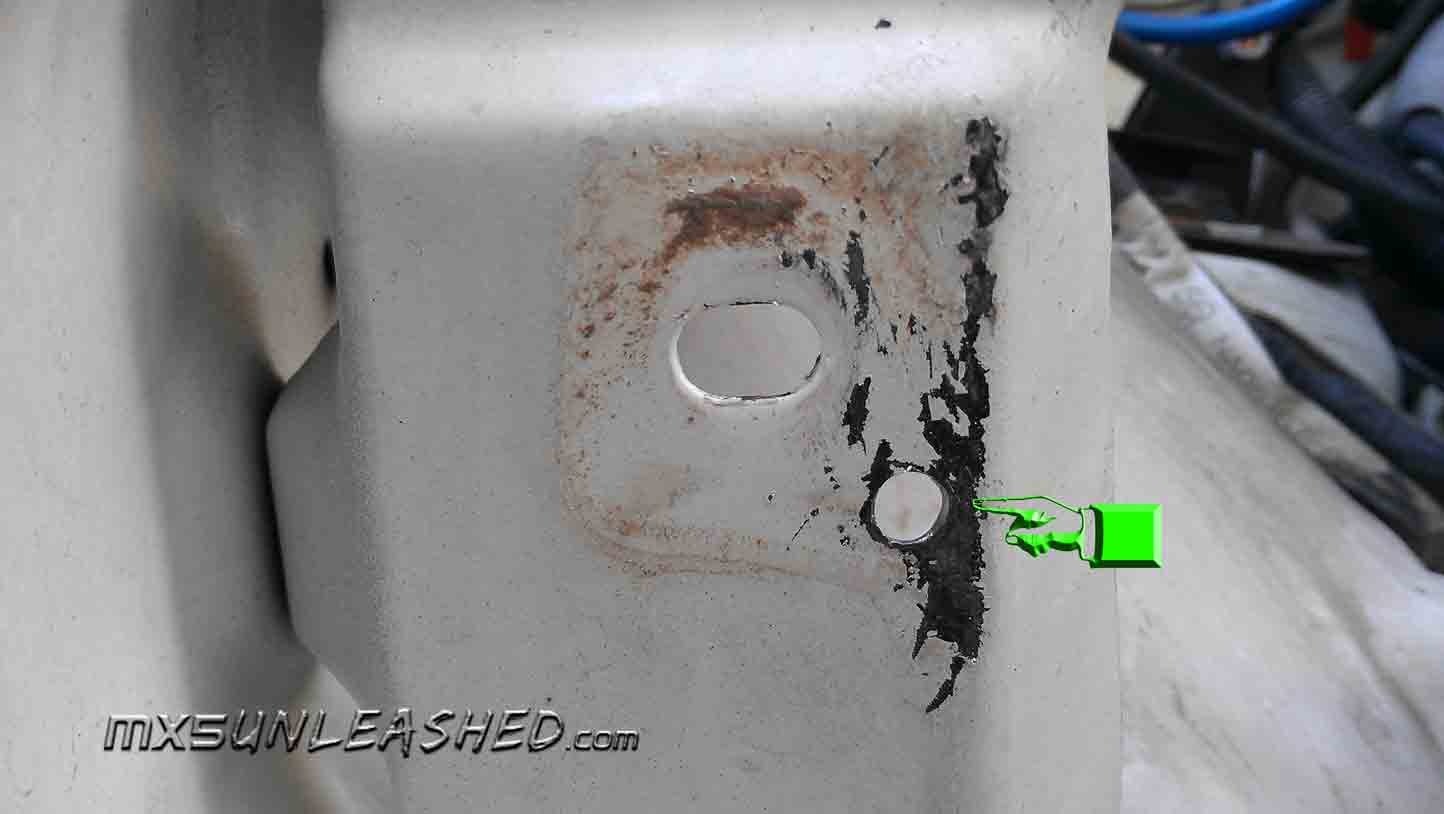
Here is the hole location that you have to drill in the light shell. |
click to enlarge |
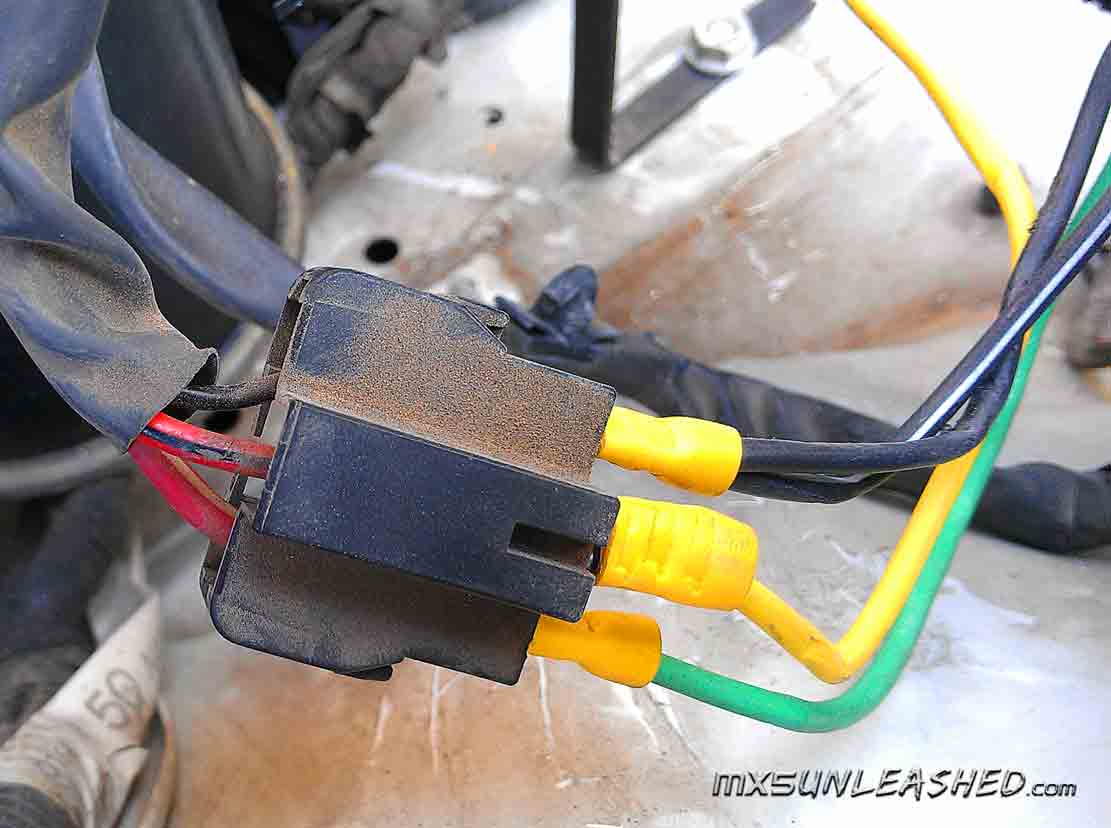
Cramp on some flat tab connectors on the wires. Both black grounds will go to one. This will allow you to plug the lights to the original harness. |

click to enlarge |
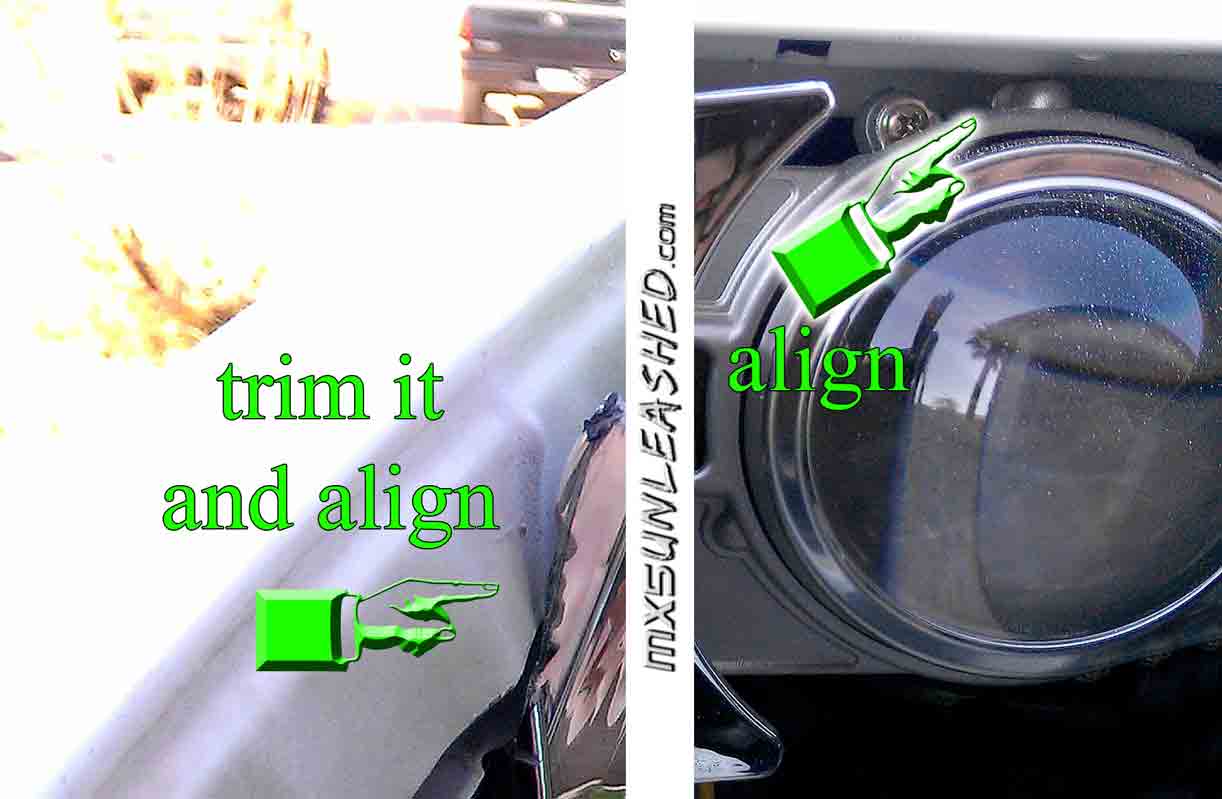
Align the light with the side panel, you will have to trim a little of the plastic from the light where it touches the side. On the top, align with the hood closed. Give yourself just enough space so that the hood can be slammed down without hitting the light. |
click to enlarge |
Once aligned with the top of the hood and the side wall, use a marker to mark the drill spot through the hole you drilled in the light assembly and then drill the hole where marked.
|
click to enlarge |
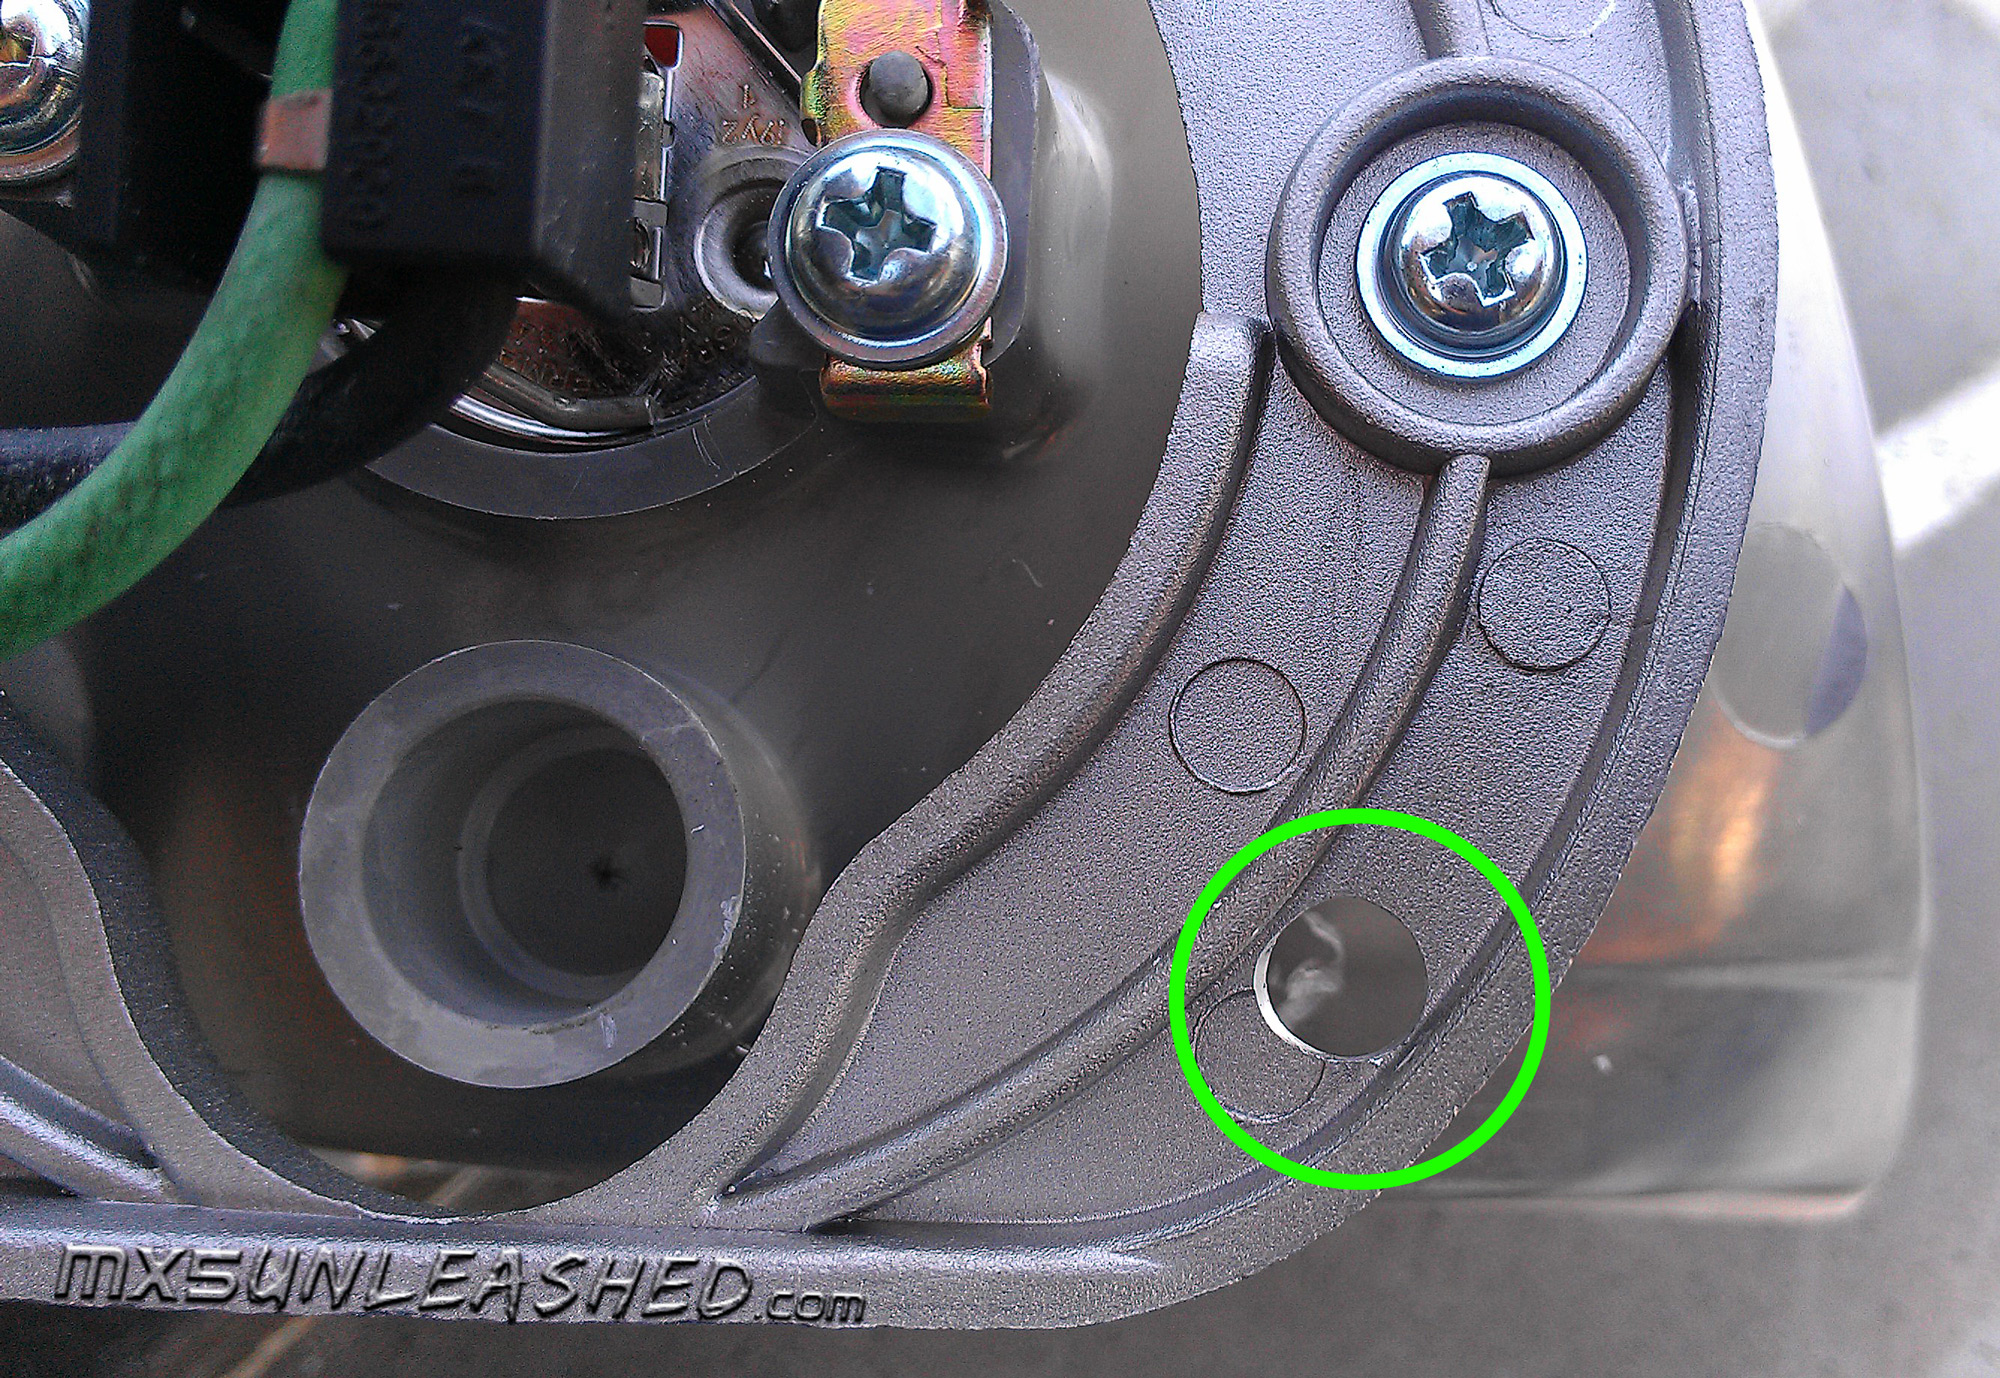
Here is the view from the back of the hole you just drilled. Put a bolt through it, then through the light assembly, and screw it in lightly for now.
|
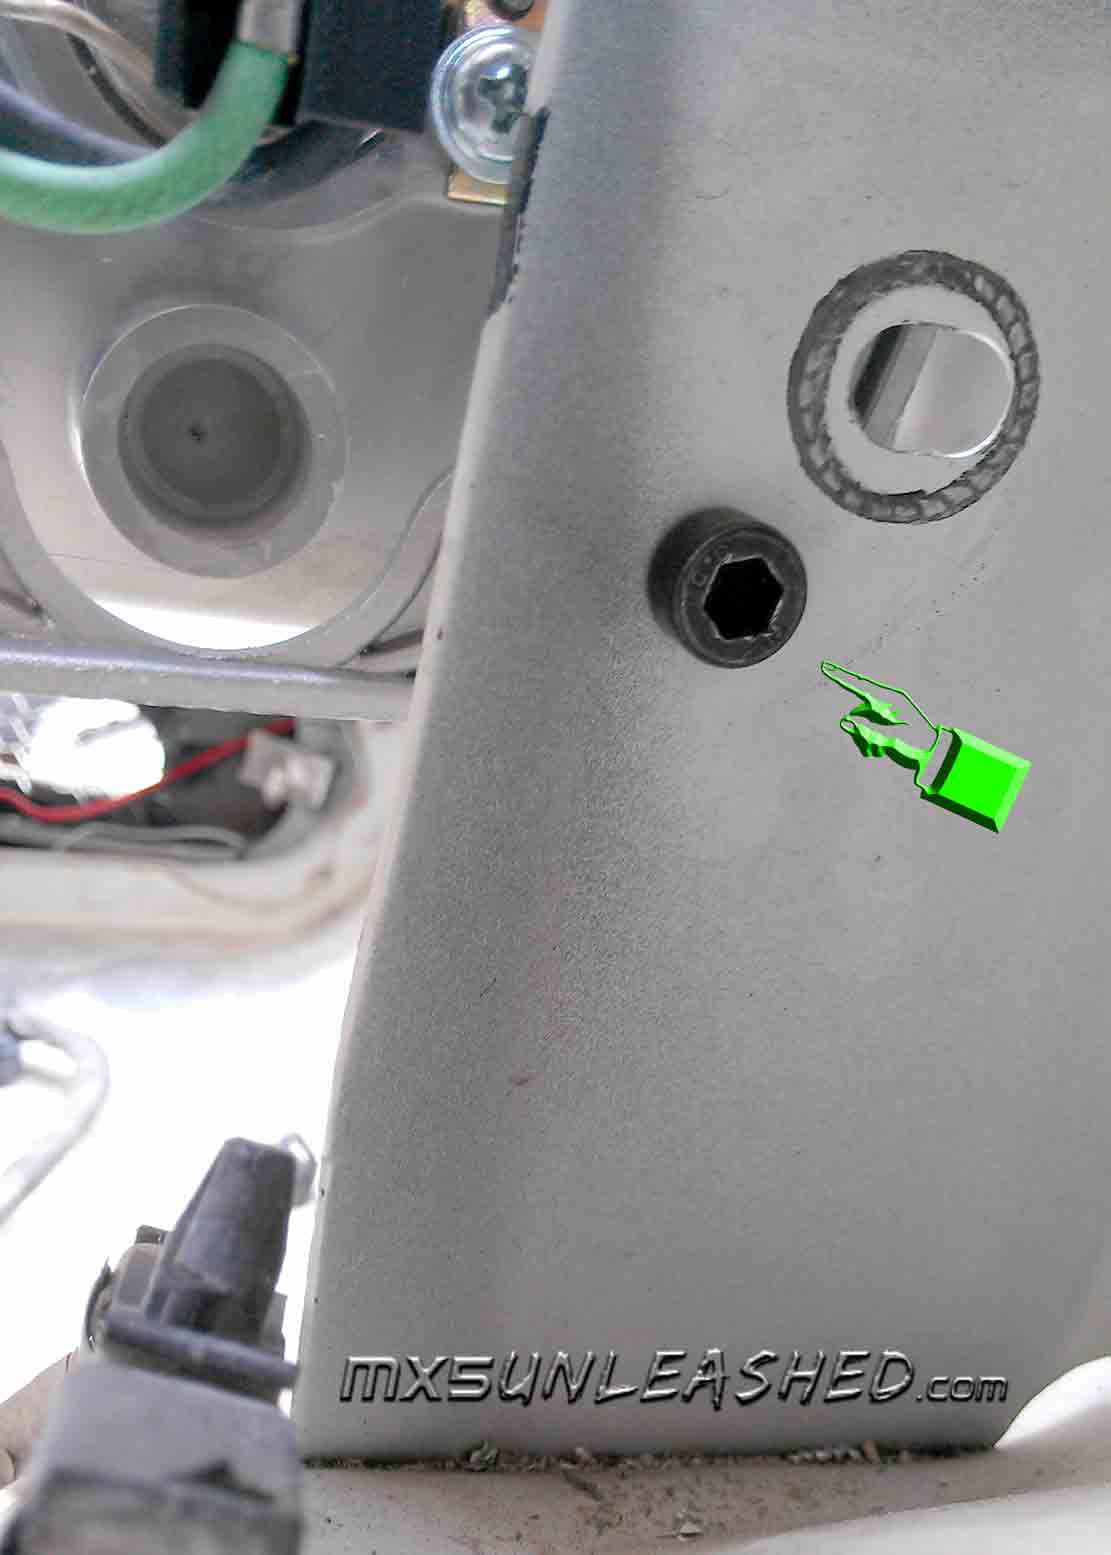
click to enlarge |
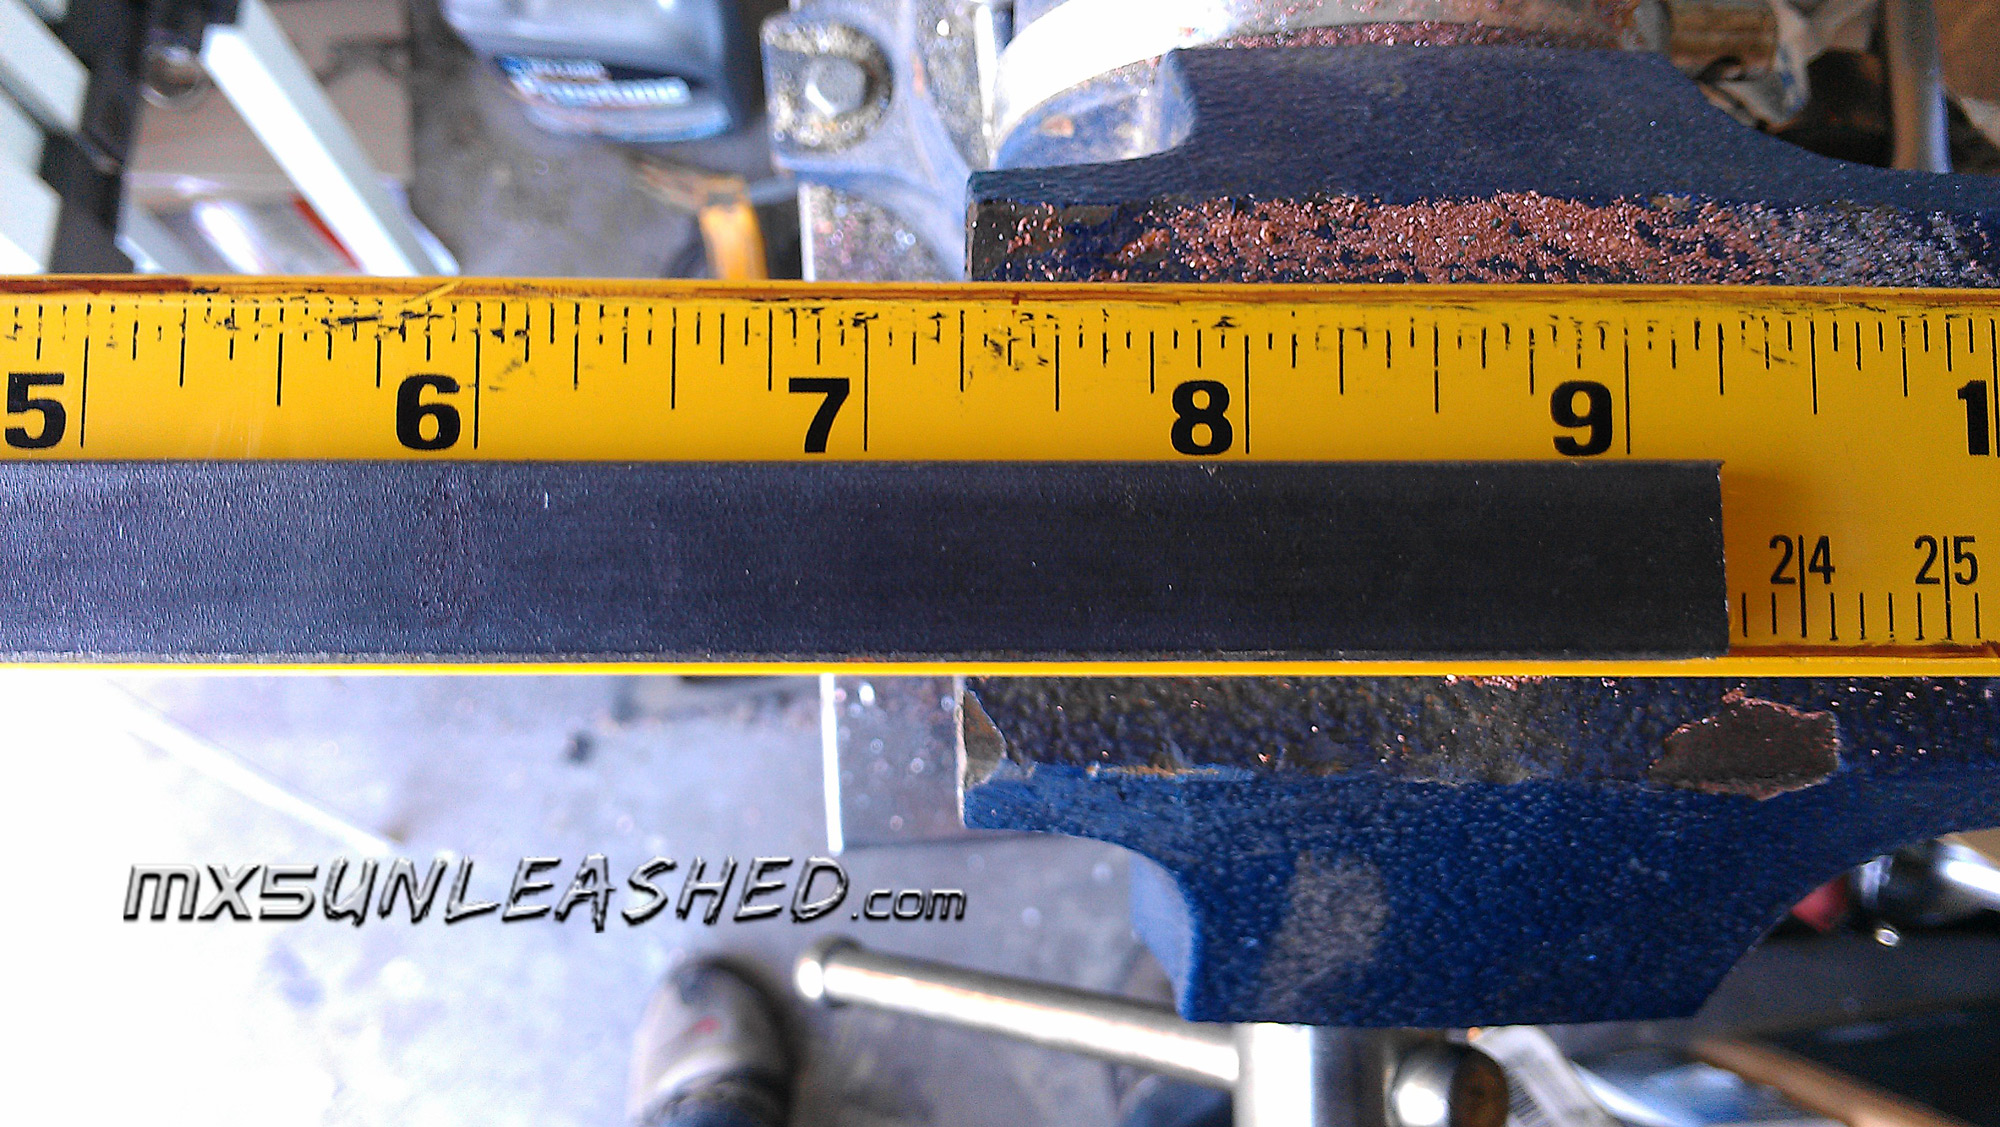
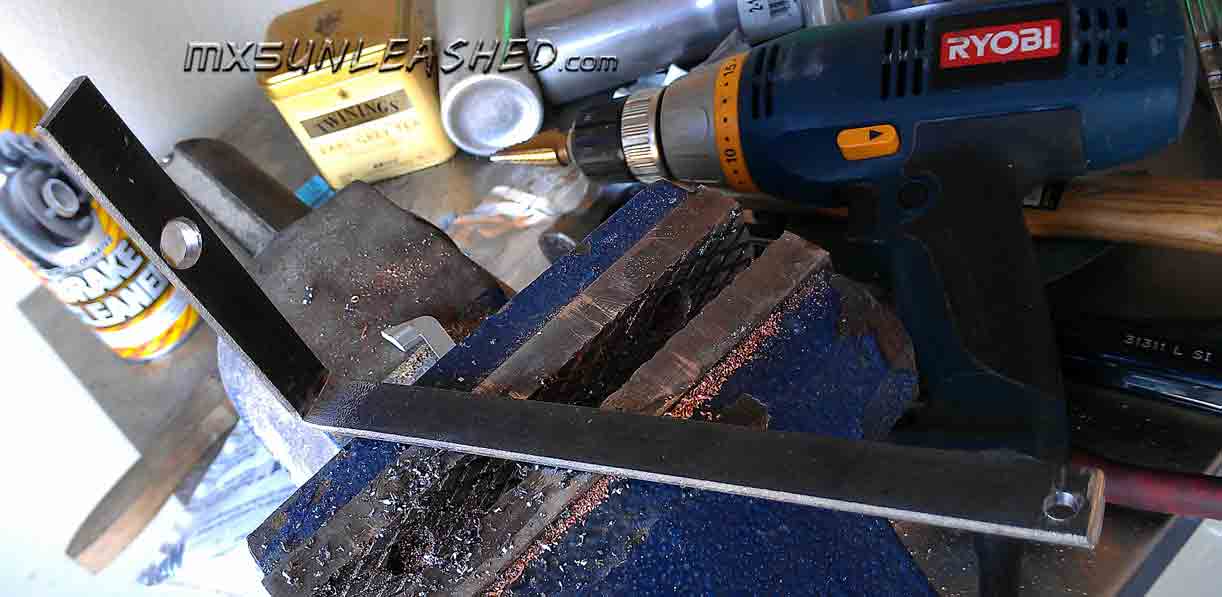
Cut 9.25" piece of steel beam.
|

click to enlarge |
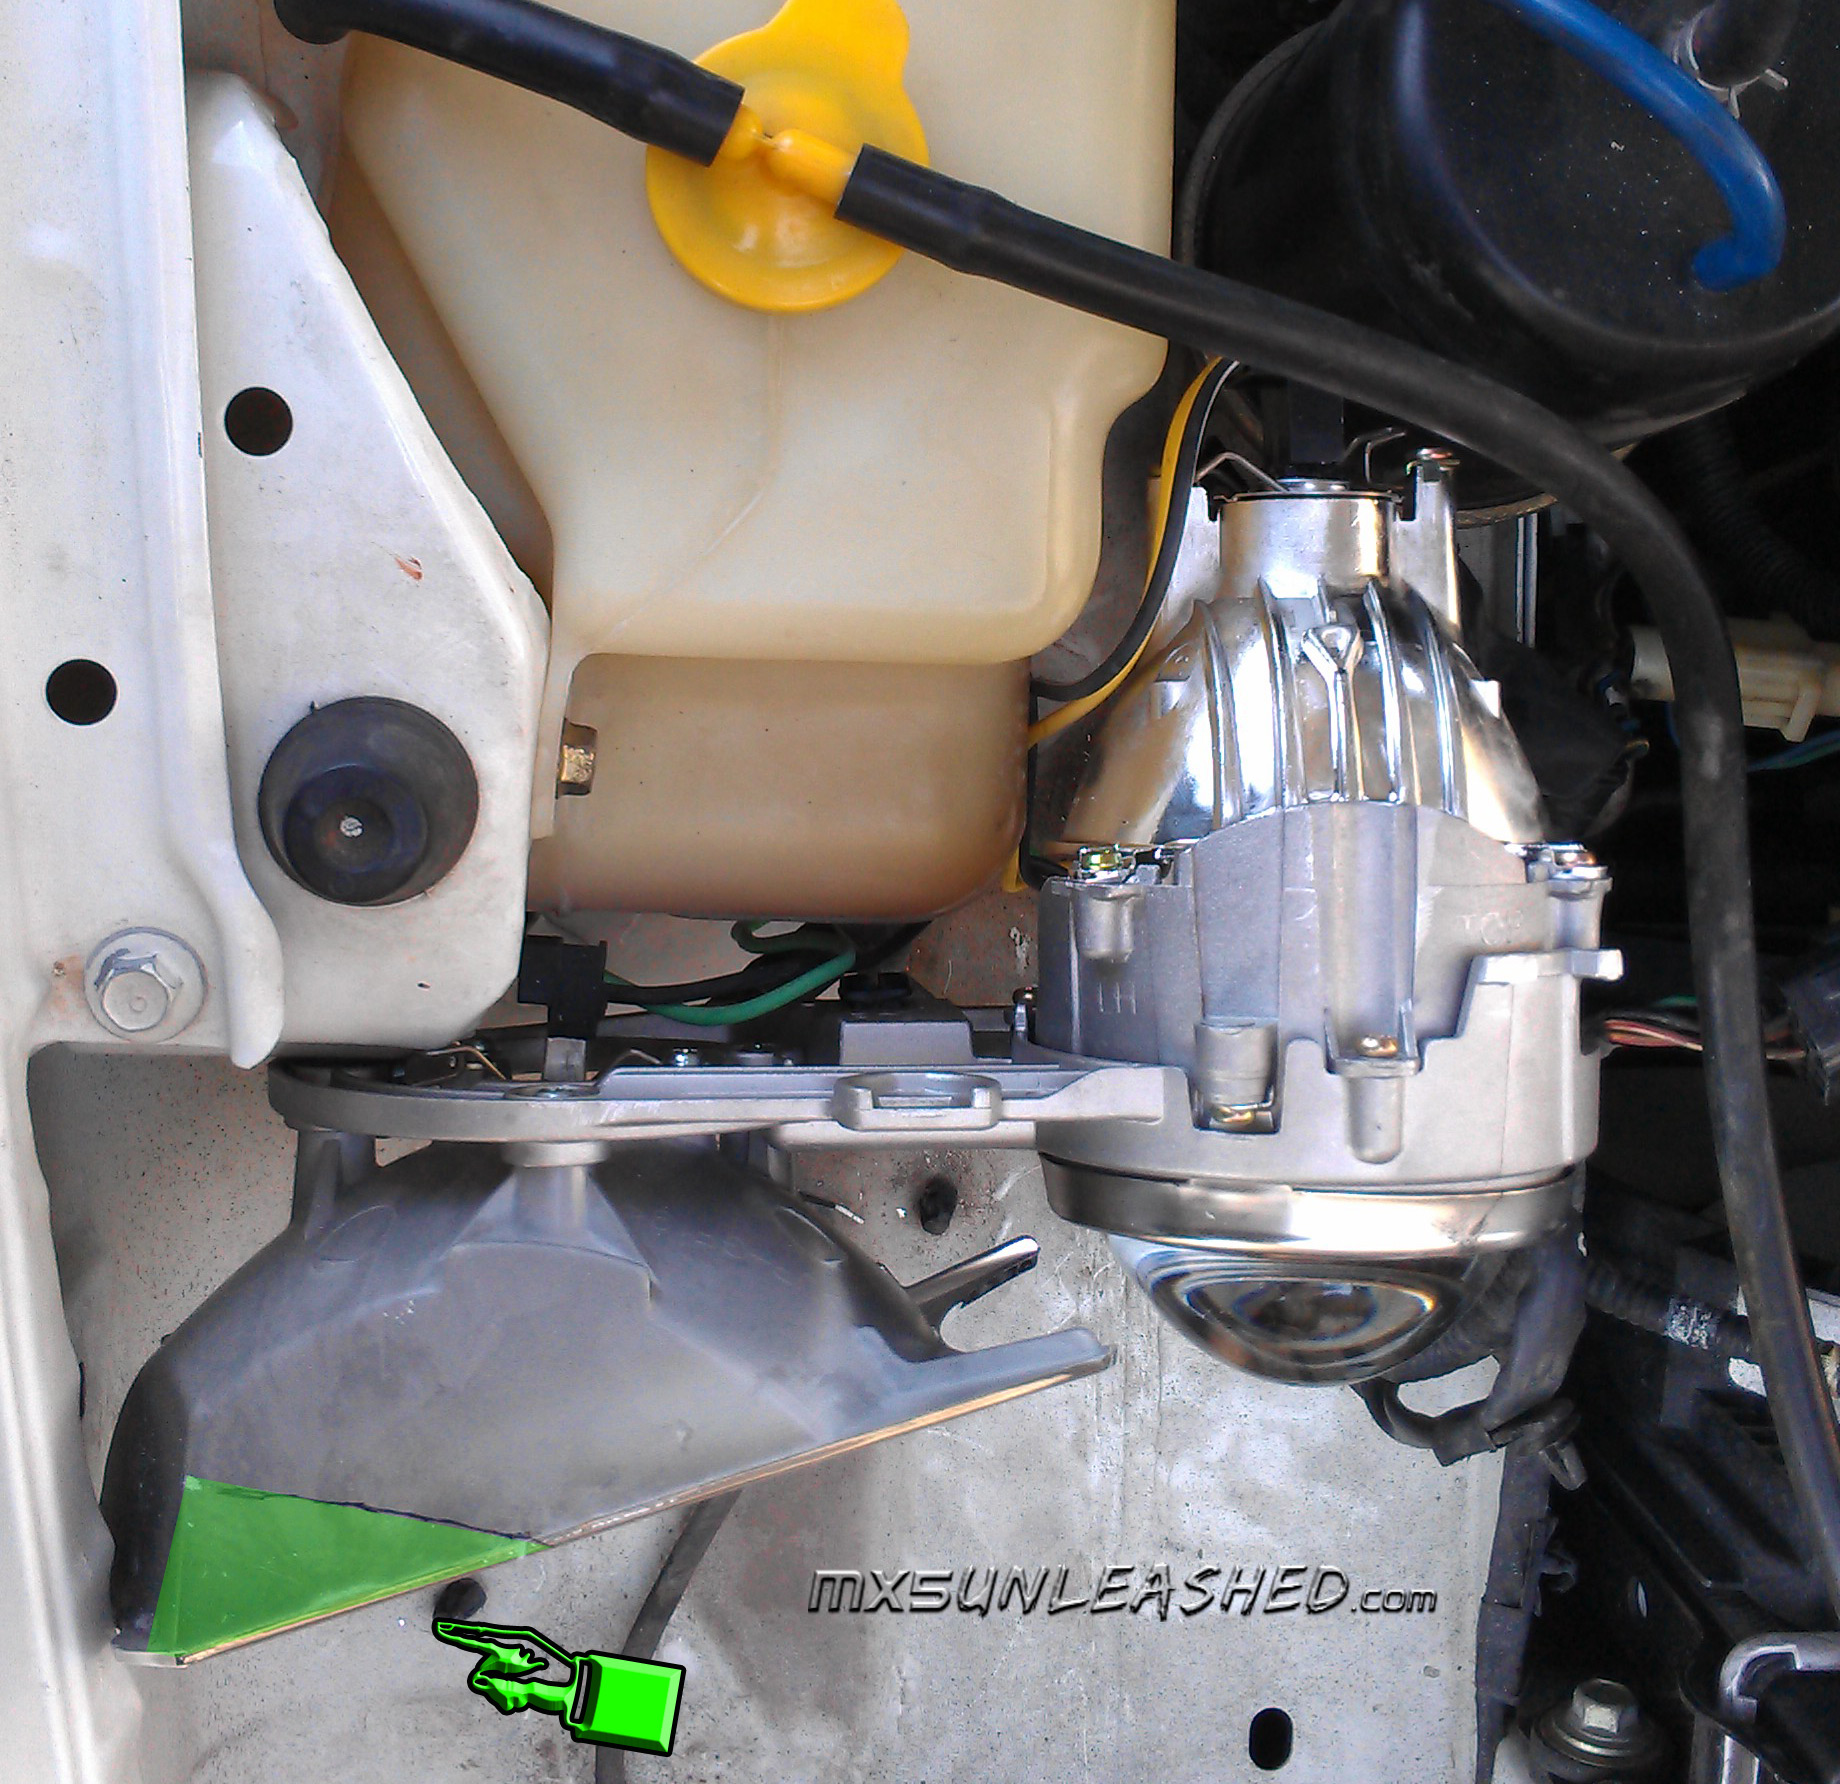
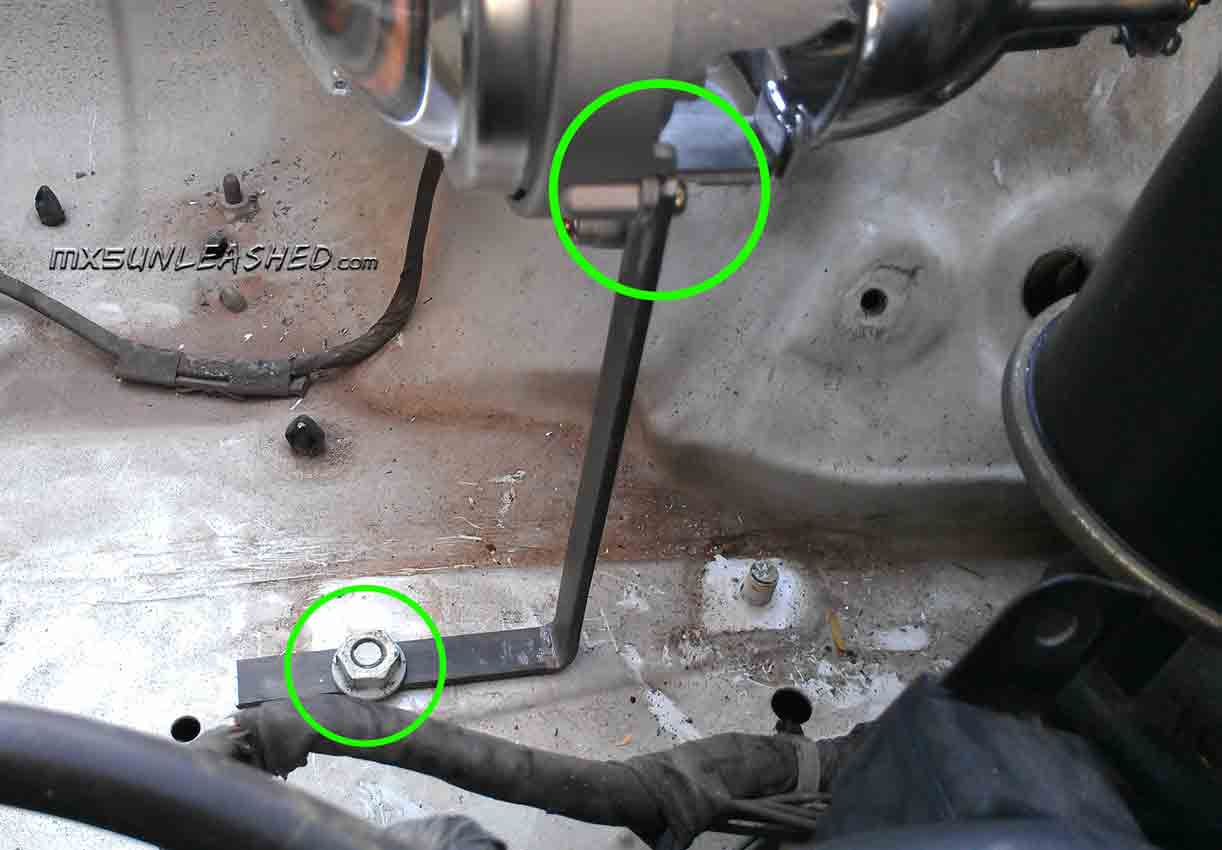
Now align the straight beam with the bottom of the light bay and with bottom screw on the light assembly. Right above that screw make a mark on the beam, this will be your bending point for your 90º. Once you bend it, place it back with the light and mark where the hole for mounting will be. The top one screws in to the bottom screw of the light assembly and the bottom one will attach to the one of the pop up light mounting points. So mark it and drill the holes, then lightly attach them for now.
At this point you can put the overflow bottle back in.
|
click to enlarge |
click to enlarge |
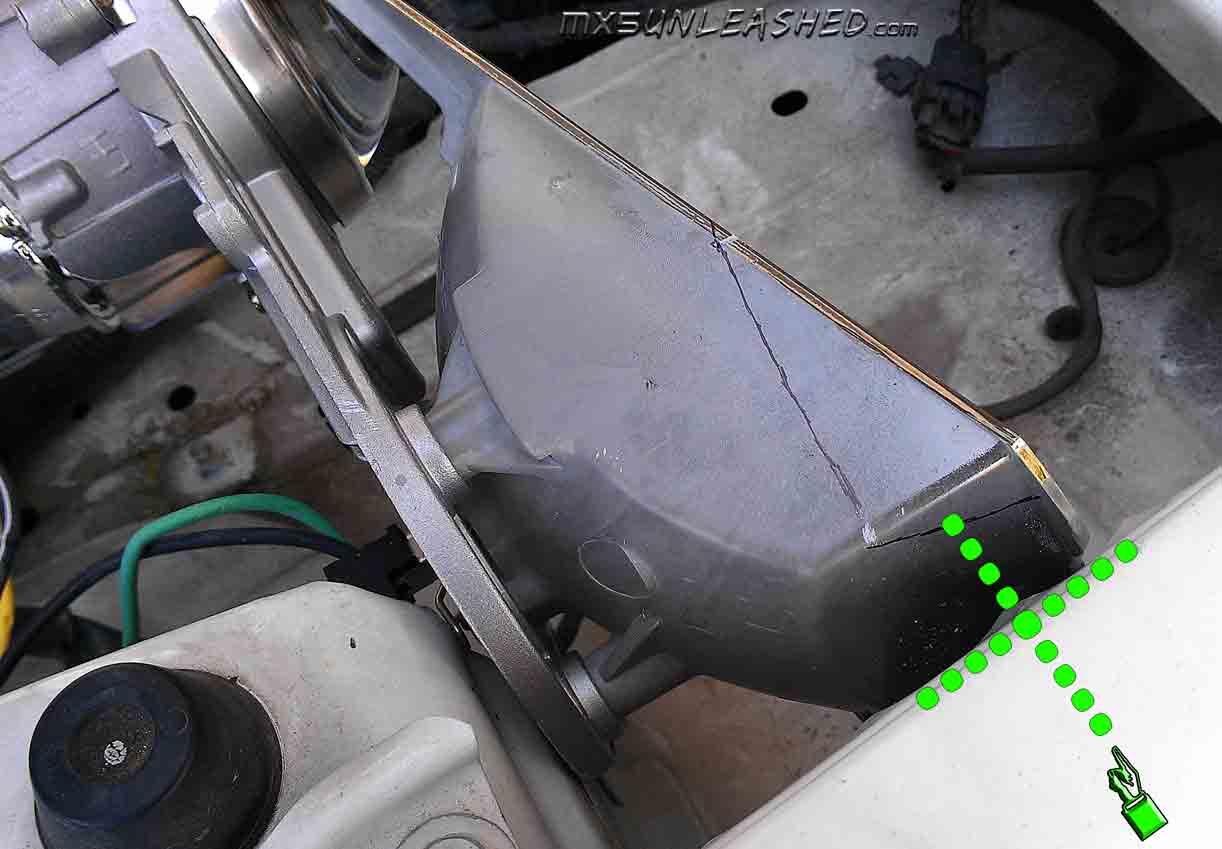
Now a small corner has to be trimmed off the top of the light, so it does not hit the polycarbon cover. Align your eyesight with the edge of the body work and then draw in the line on the light cover about an 1/8" below the crossing point, so that once cut, the polycarbon cover will fit nicely. You can keep the cut piece for later. Notice how everything fits well, though I'm not sure how well it will fit for cars with steering wheel on the other side like in the UK. |
click to enlarge |
click to enlarge |
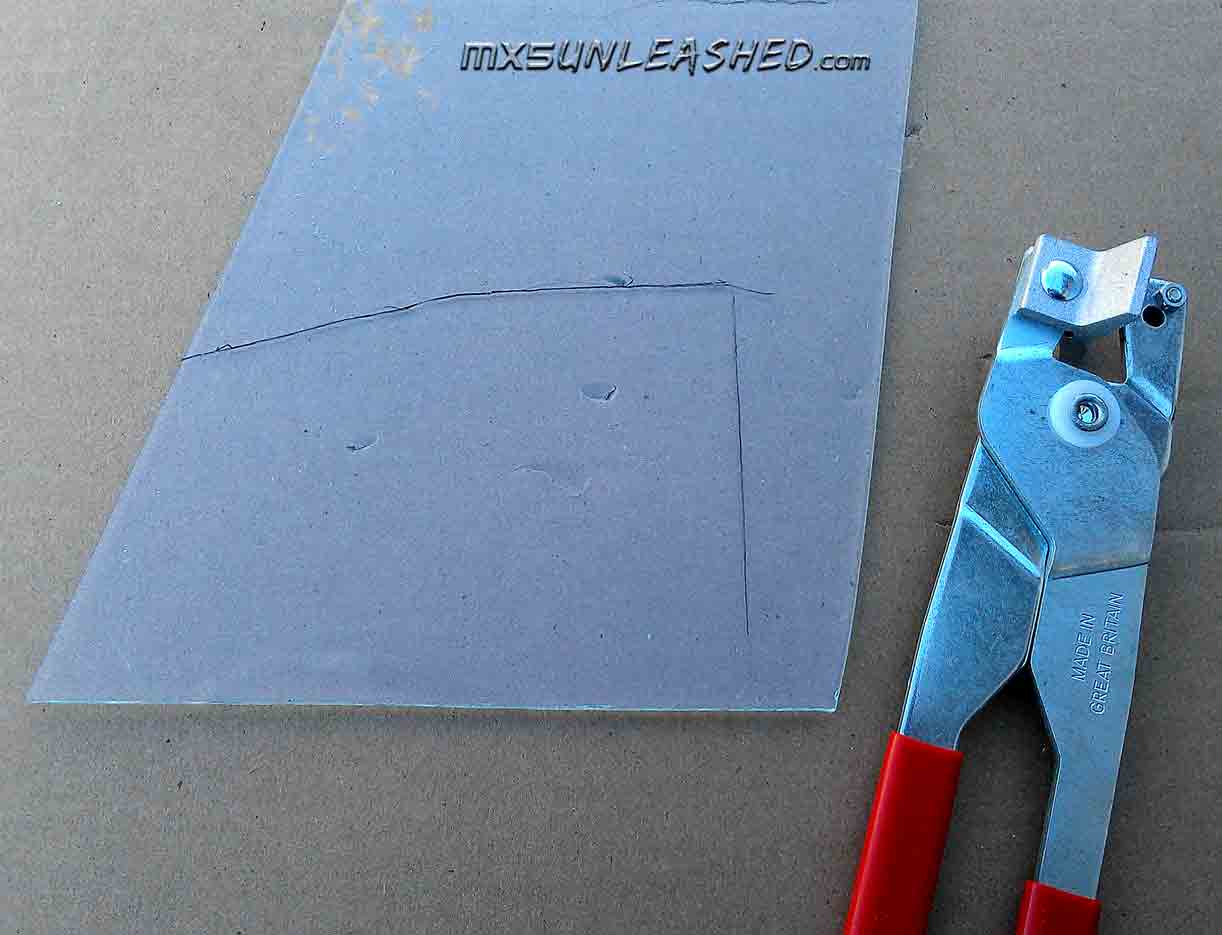
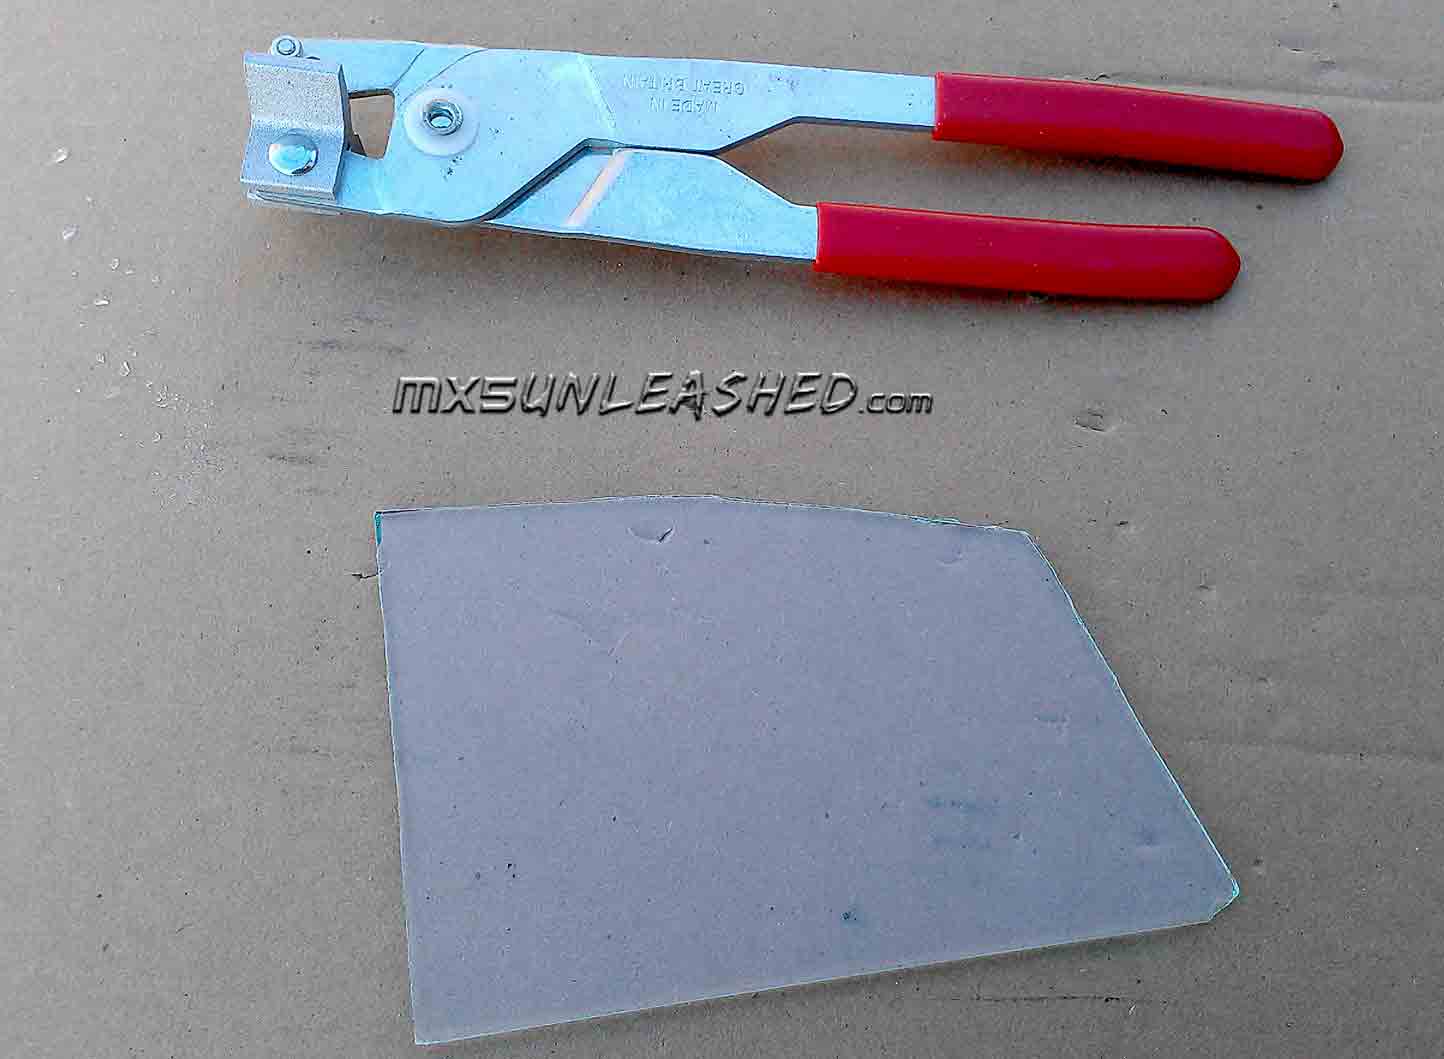
You will have to trace the shape of your high beam and place that trace on the glass. Since we took out the light assembly out of the original containment, the lights should be sealed so that the dirt or humidity does not get to the light bulbs, or they'll be popping (but not up). ;)
Once traced, cut the glass out with a cutter (BE EXTREMELY CAREFUL, ESPECIALLY IF THIS IS YOUR FIRST TIME CUTTING GLASS).
Only glass can be used, since the high beam light bulbs get super hot. |
click to enlarge |
click to enlarge |
Next I used some caulk to attach the glass to the high beam Make sure the inside is super clean before you add the glass on. Also the piece we cut from the top, can be glued to the bottom corner since the light that shoots from there would only light up the inside of the light compartment and not the road. This way it may bounce back and hopefully end up on the road, though this is up to you. Tape the glass to the light and let it dry over night. Also at the bottom leave a small gap in the sealant in case some water would get in some how, it would have a ways to escape.
While it's drying, this is a good time to gut the other light assembly out if you haven't done so. |

click to enlarge |
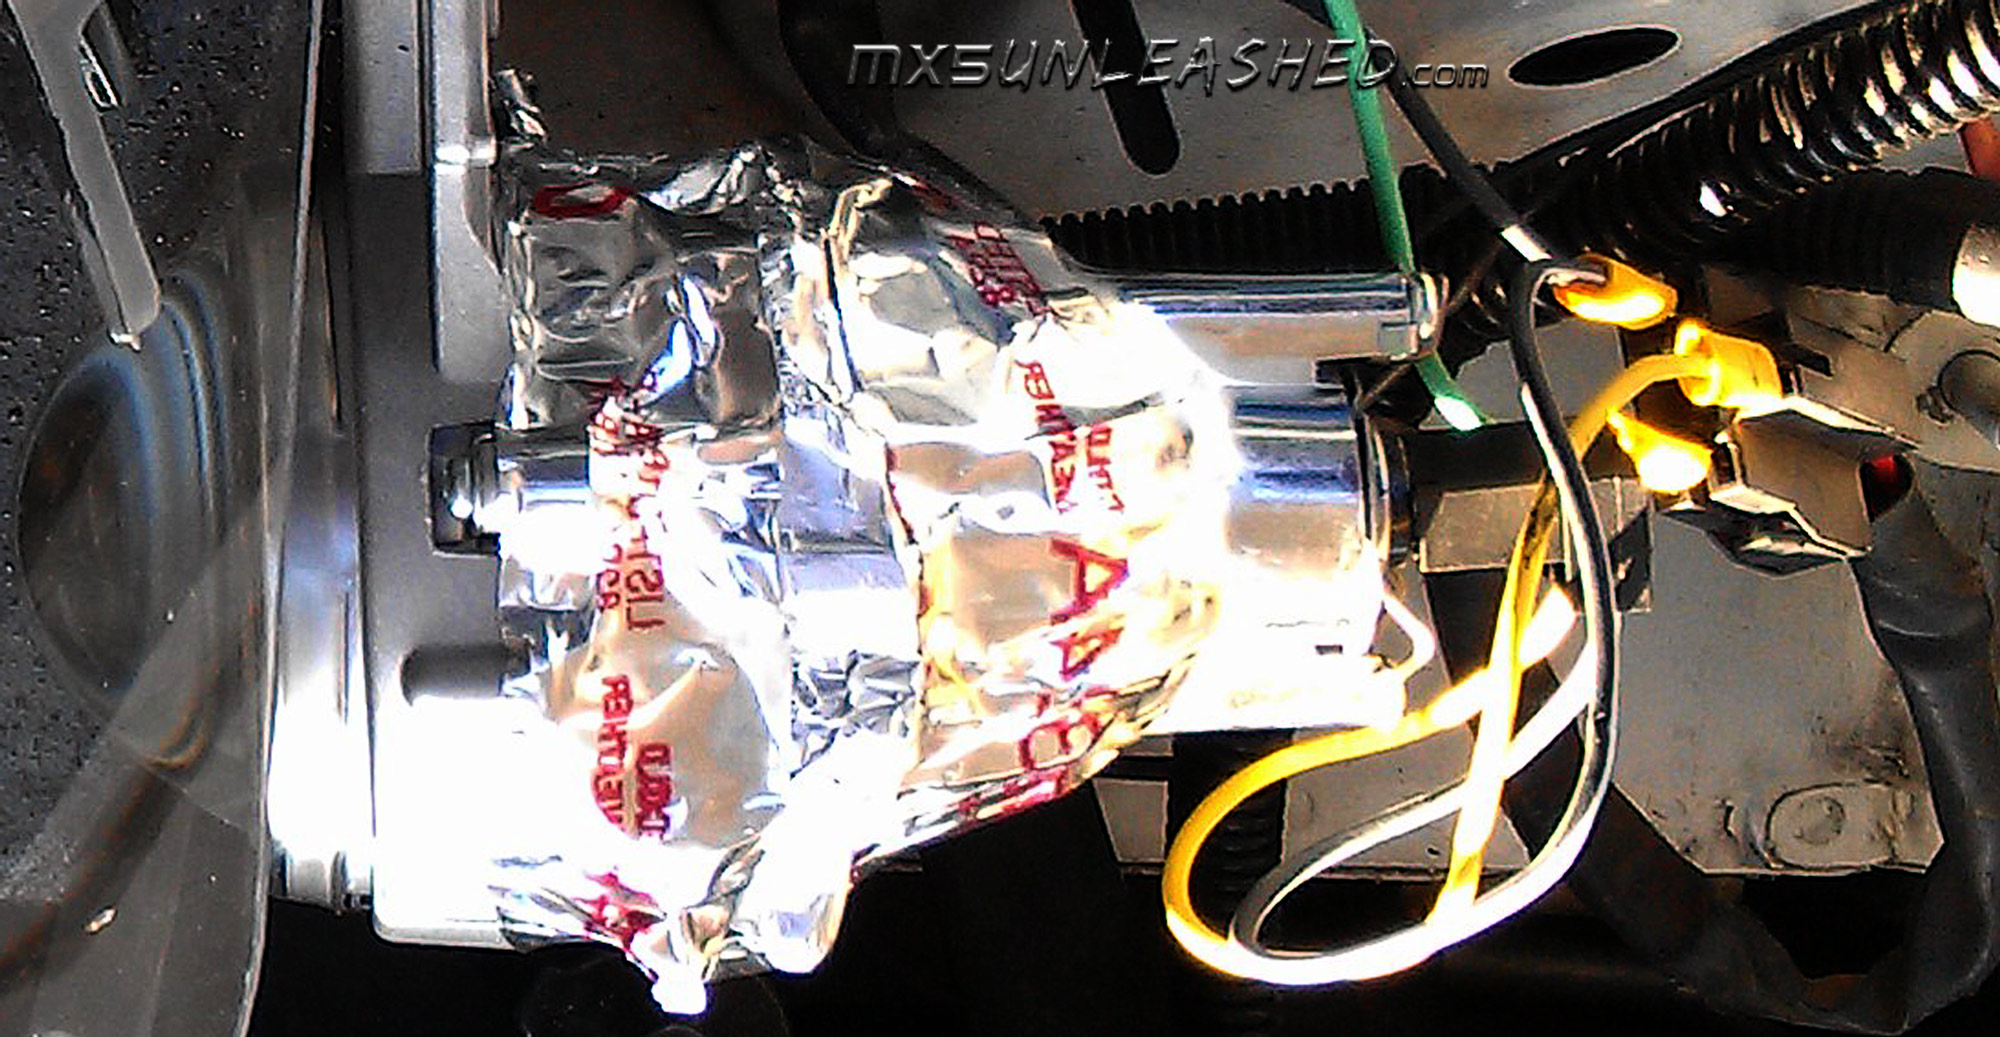
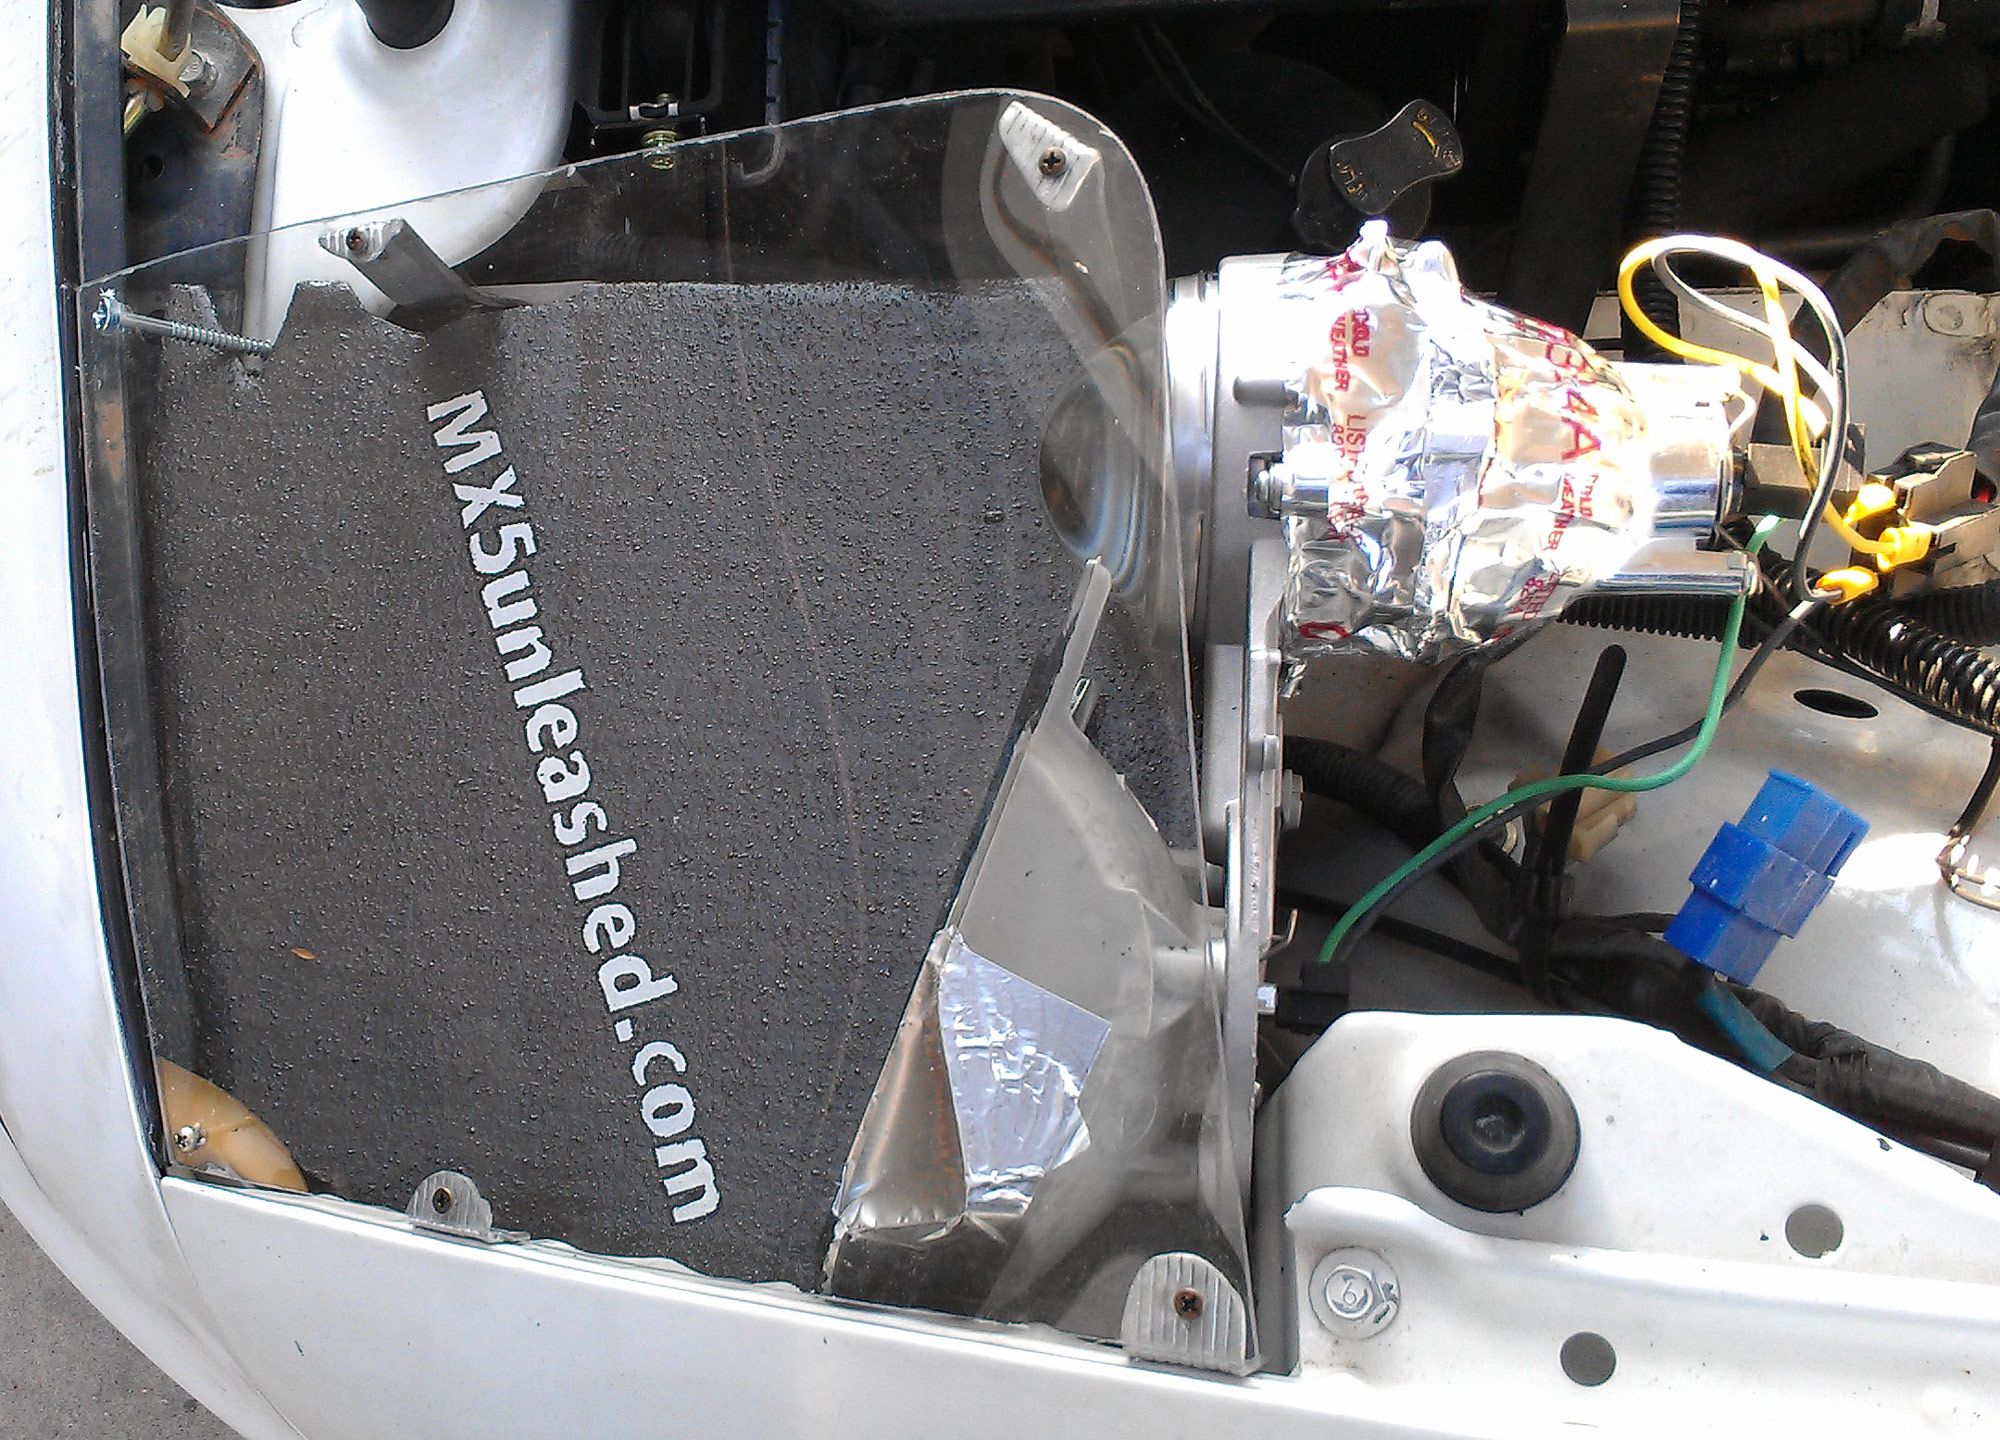
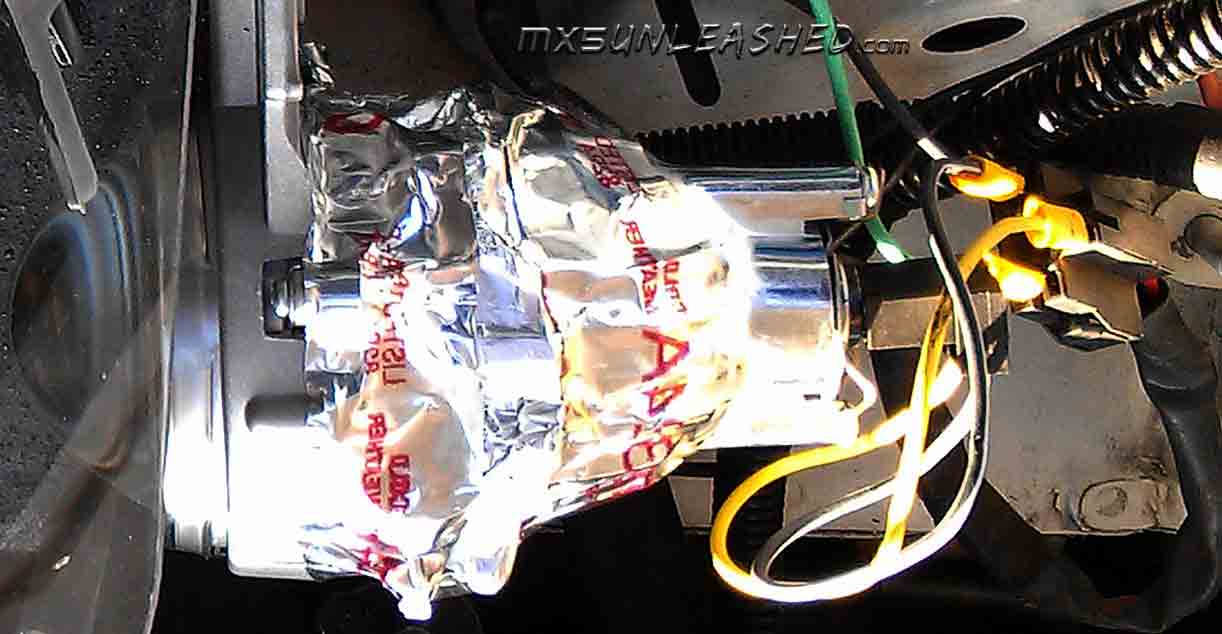
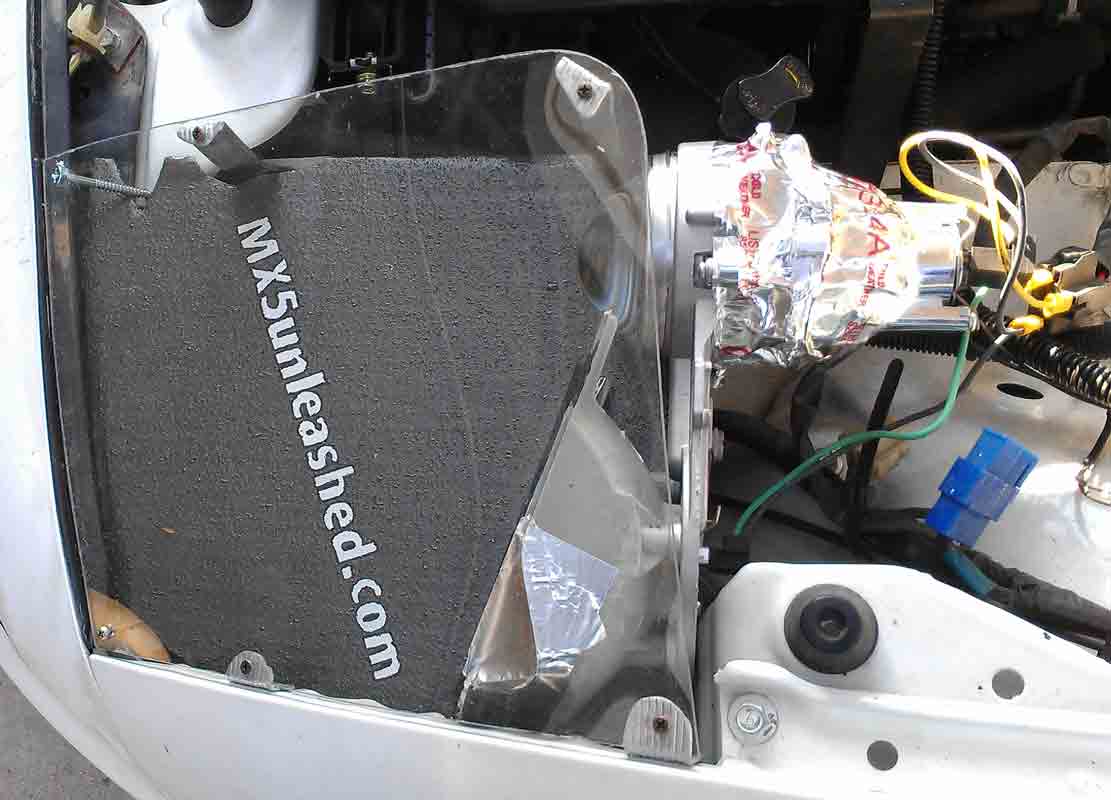
The next day, once it is all dry, tape the top hole with aluminum heavy duty duct tape. This stuff can take the temperature and it reflects the light too. Once the polycarbon cover comes, you can paint this area over so all this wont be visible. |

click to enlarge |
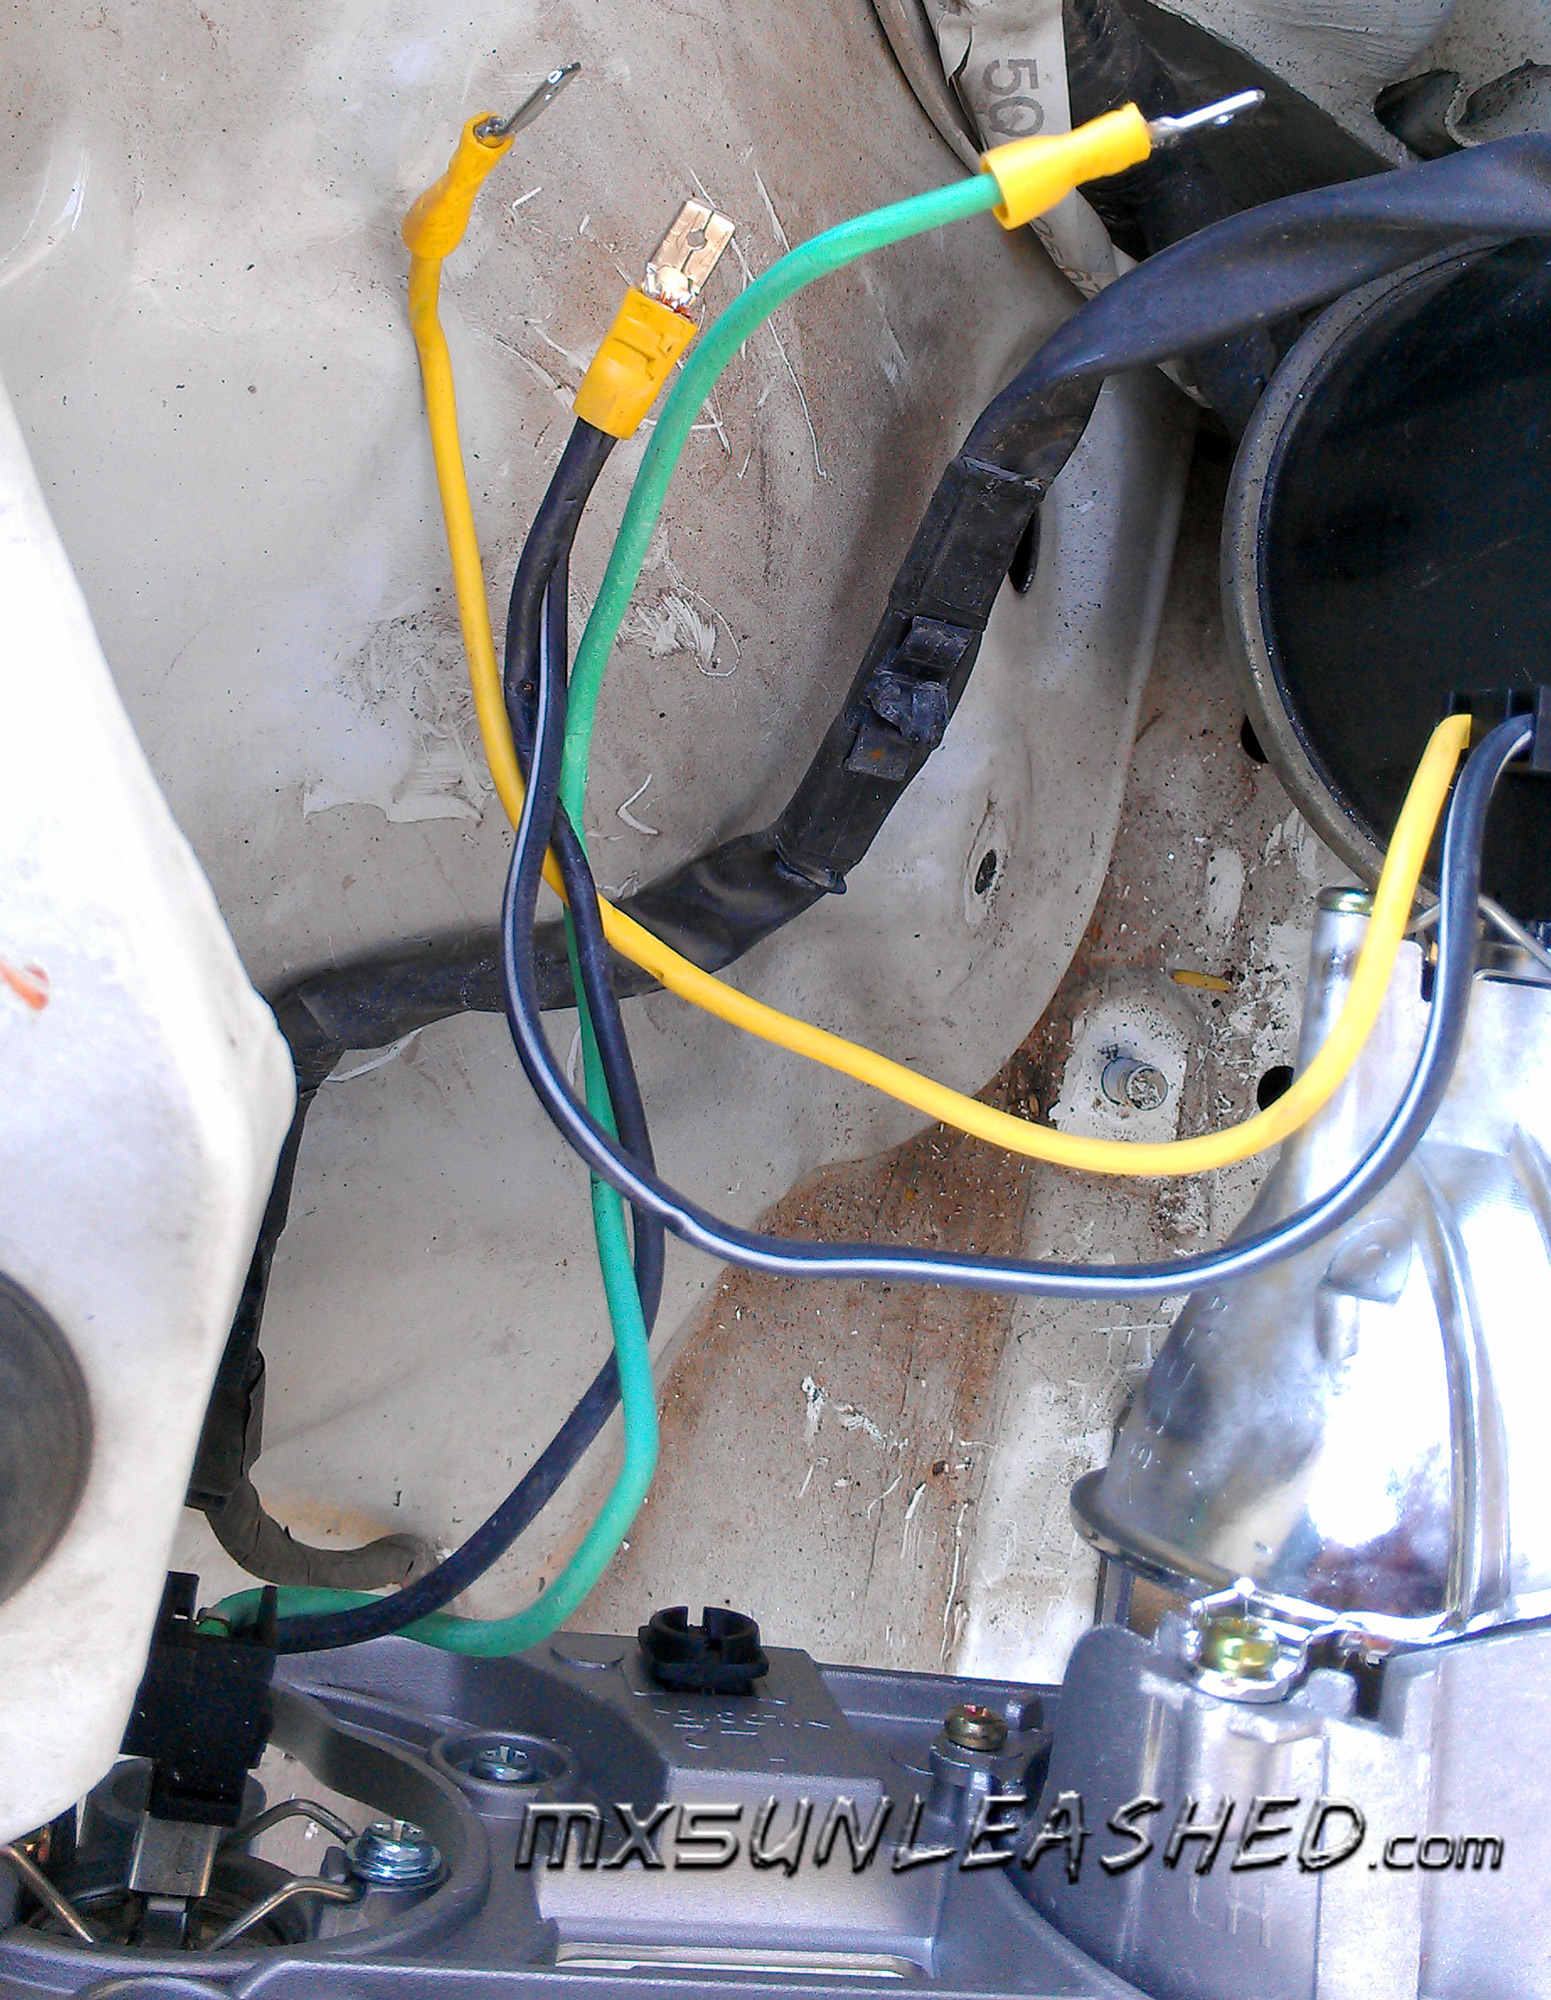
Time to connect.
• 2 Black ones go with the black
• Yellow goes with the red and a black stripe
• Green goes with red and white stripe
Now test the lights again and make sure the bulbs are still working. |
click to enlarge |
I also sealed headlight with the aluminum duck tape so that the dirt does not get in on the light bulb. Aluminum tape works great for a lot of things. |
click to enlarge |
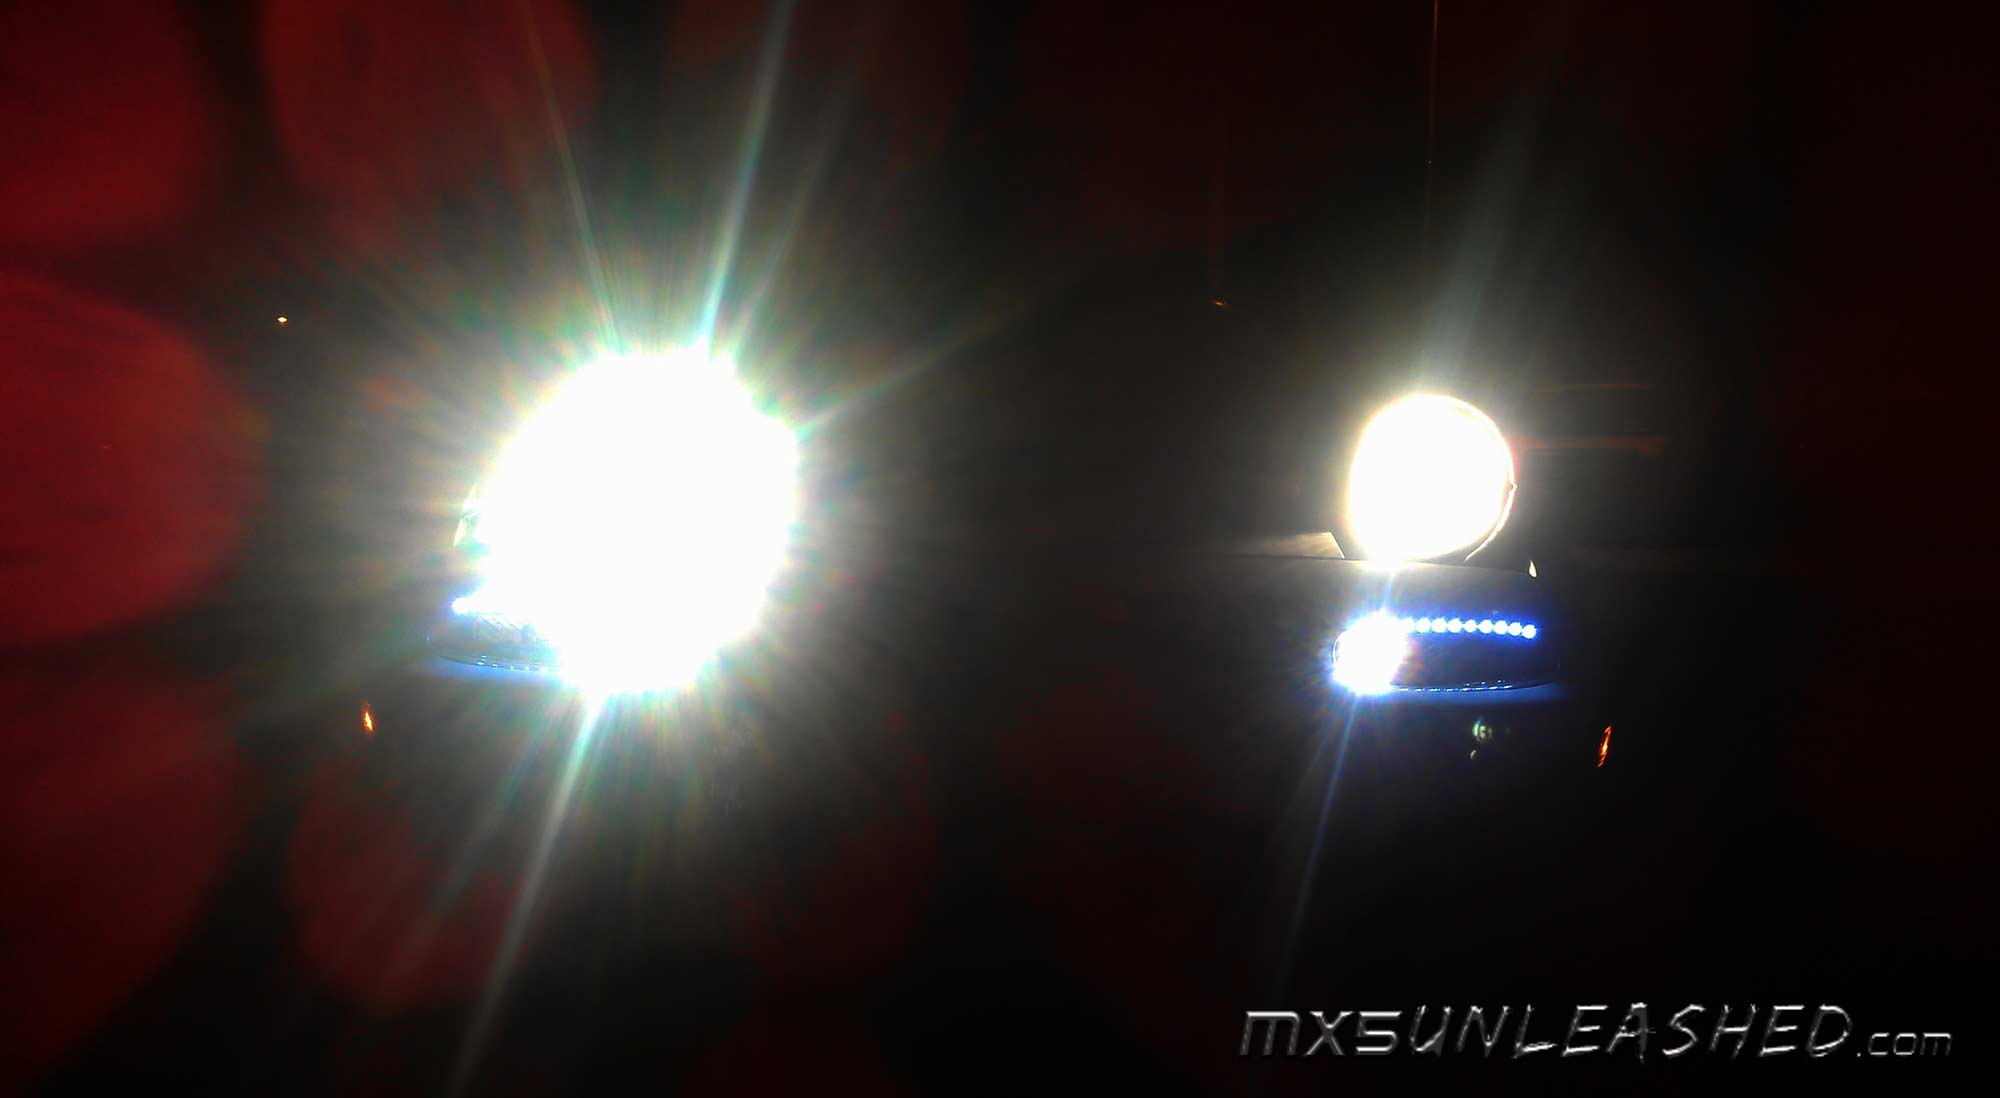
To align the light with your old pop up light, get the car in front of a wall about 10 yards away from it and turn on the lights on the low beam. You will see the light beams on the wall, the slightly faded one is your original light the one with sharp line is the projector. Now just align the beam of the projector about an inch below the pop up line since it sits a bit lower, you want to make sure it's not blinding people. It should be pretty close as is but you can adjust with little shimmies. Once satisfied, tighten all the bolts and screws that hold the light assembly.
If this is your 2nd light, just align it exactly with the first one. |
click to enlarge |
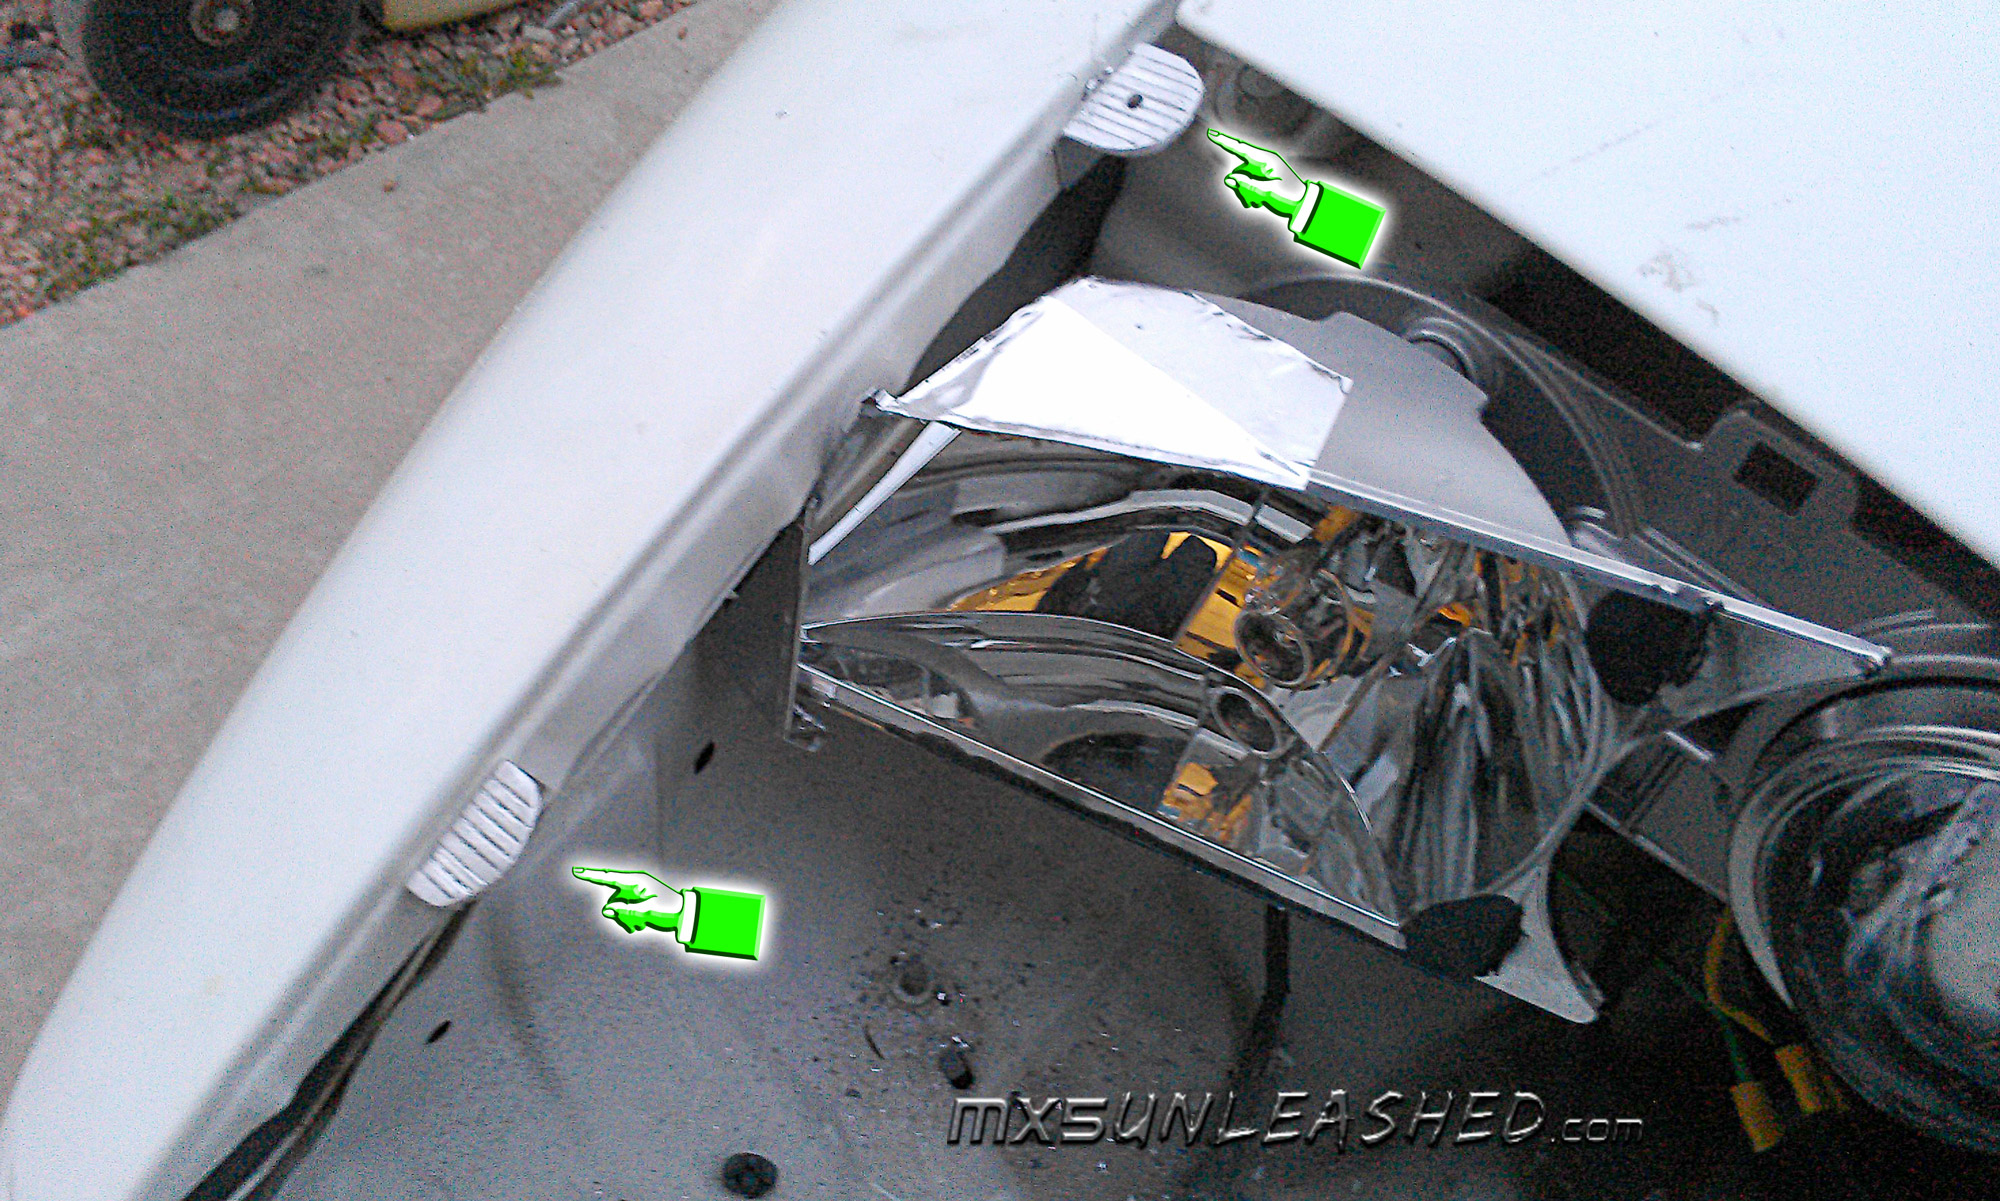
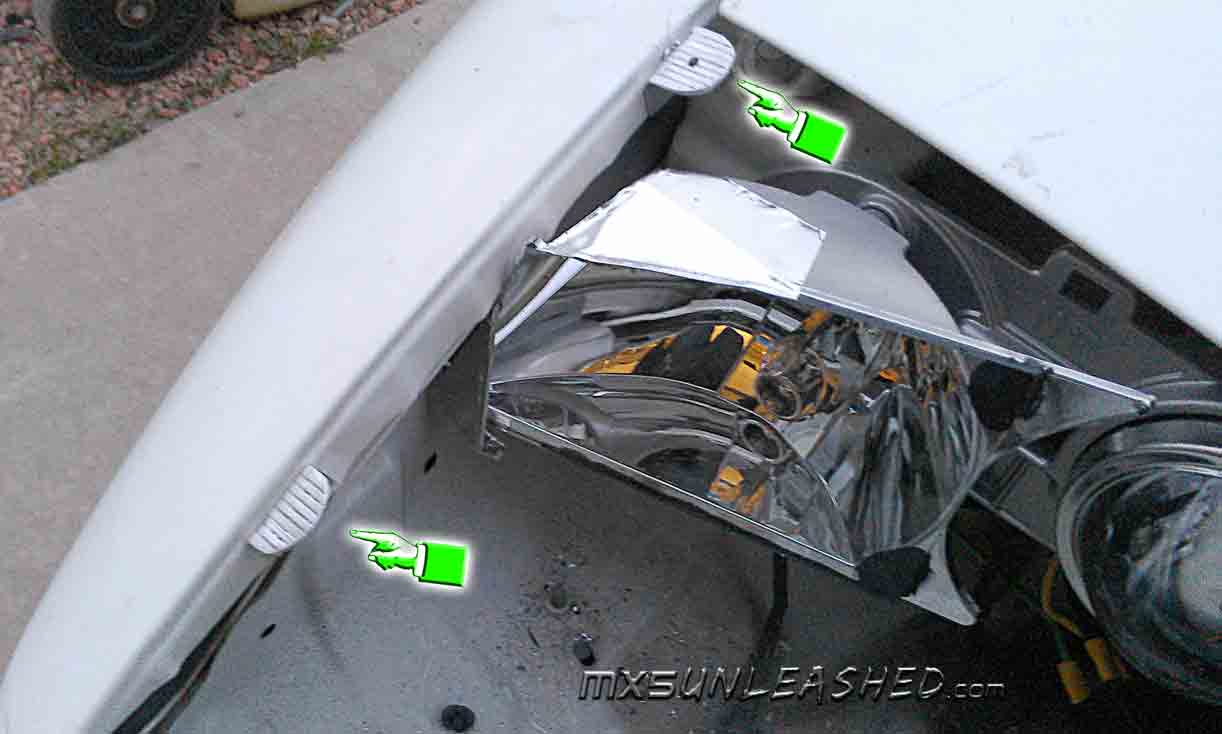
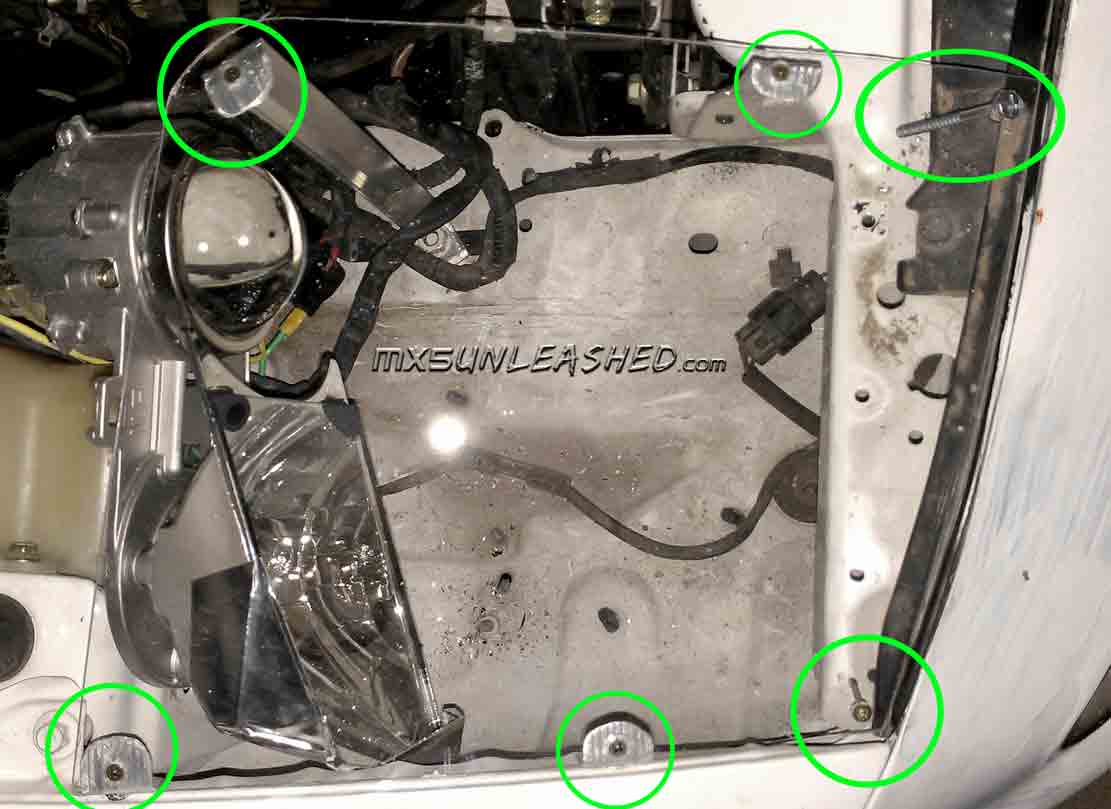
Making aluminum brackets is mostly easy, just cut 2 small strips and bend them in 90º, then just drill a small hole in the bracket and in the body panel and screw it in. One is in very top corner the other about 1/3 distance from the bumpers end. They all sit about 1/8" from the top edge (the thickness of polycarbon).
The other two are bit more tricky. Shorter one just needs a hole and few bends to match the edge of the hood (remember 1/8" below). The big one will go from the screw that holds the light assembly to the top corner. It's good to mock it up with a cardboard strip first and then cut your aluminum strip and drill the bottom hole. Their tops also sit about 1/8" from the top edge (the thinckness of polycarbon). Then screw them both in. |
click to enlarge |
click to enlarge |
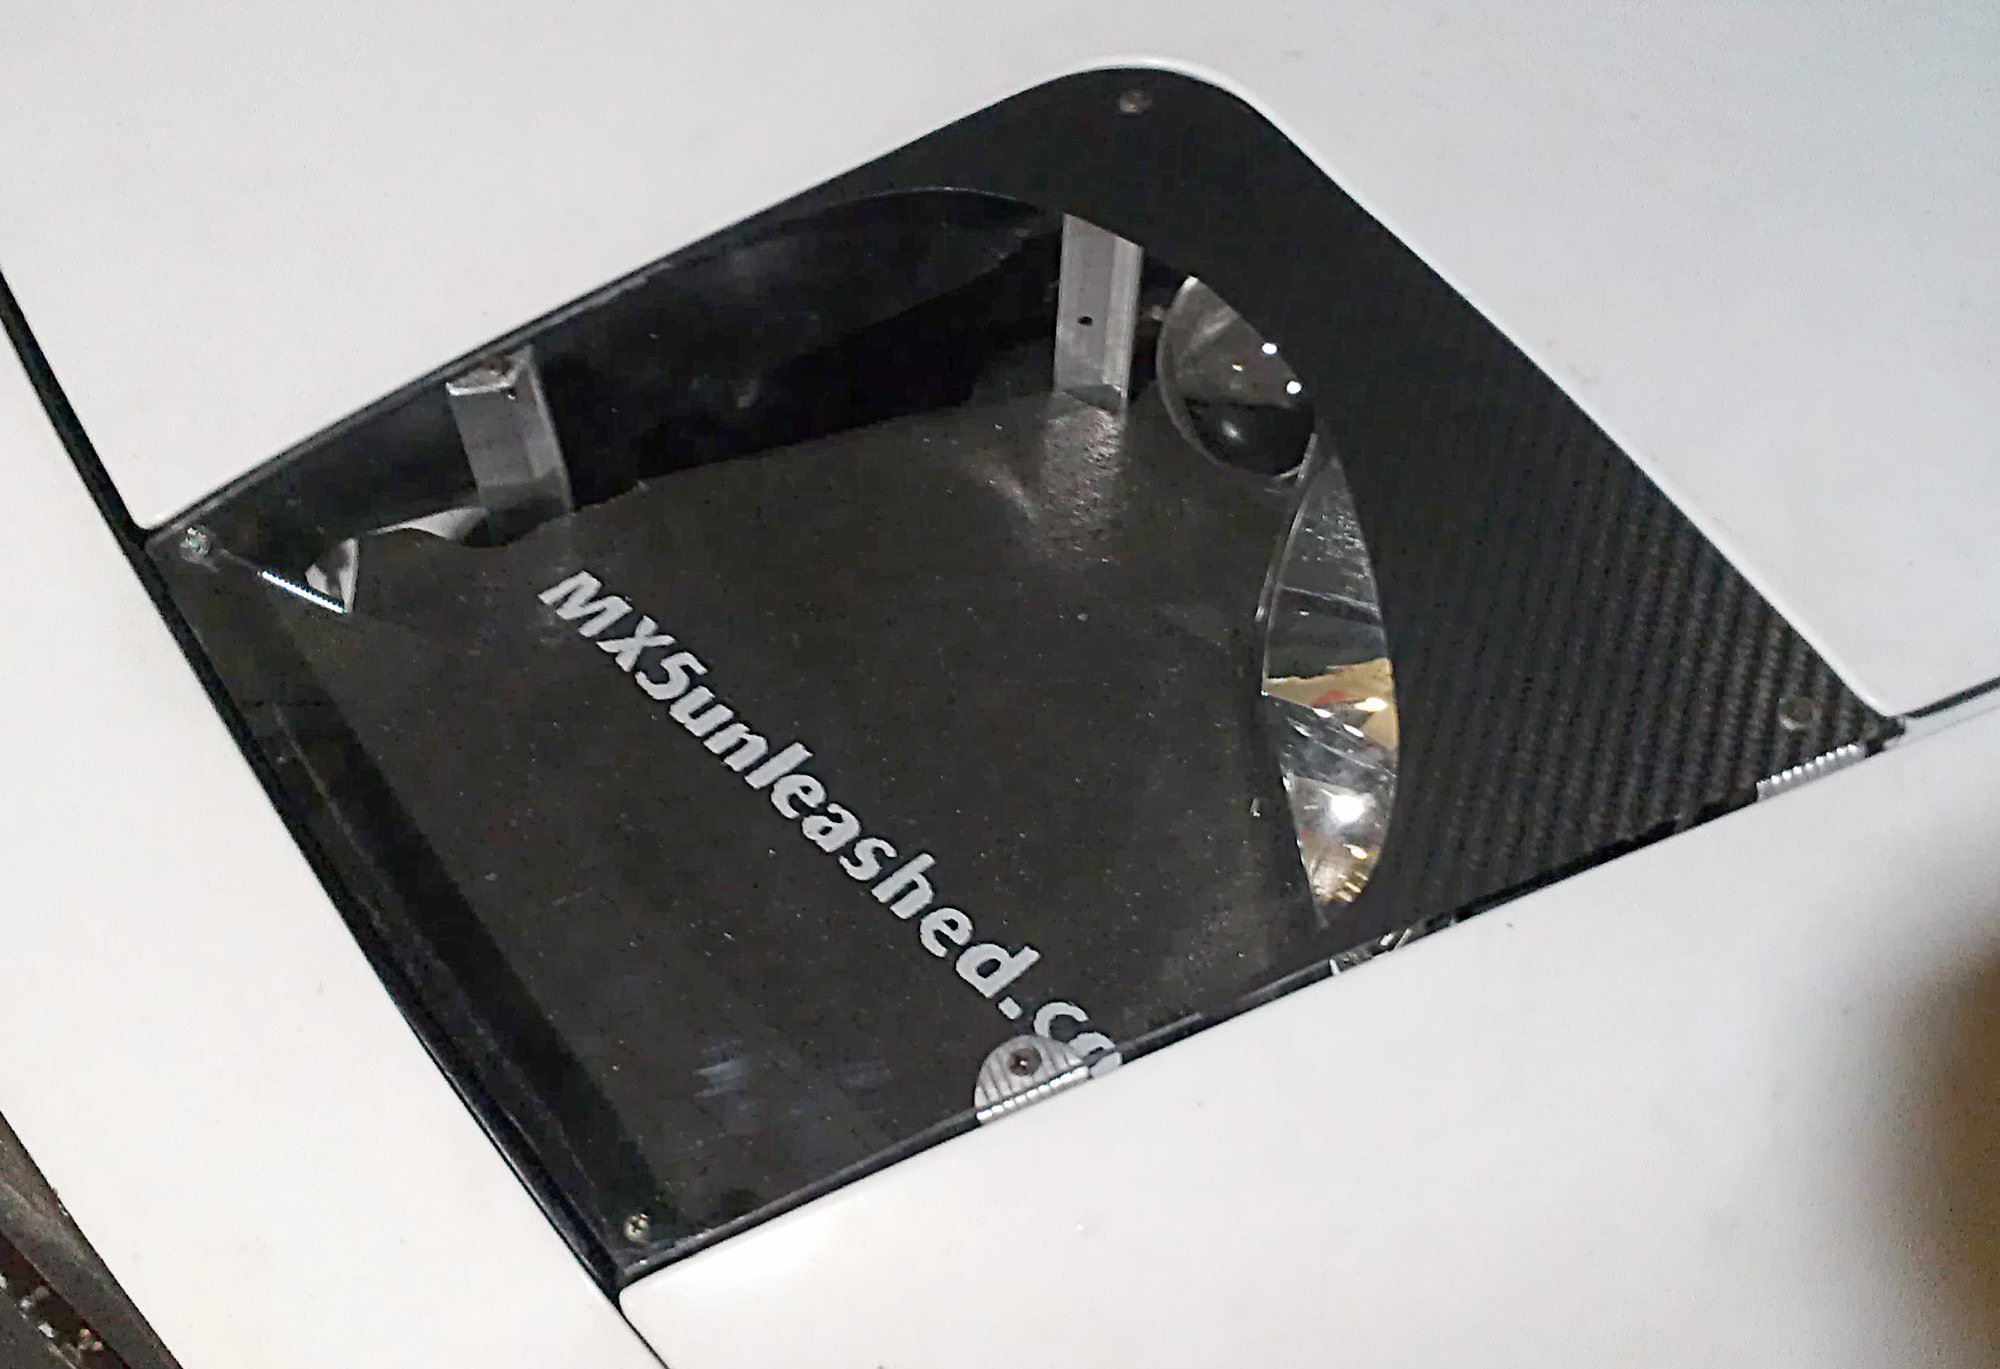
Next you pull protective sheets of plastic off of polycarbon light cover and place it on your brackets with hood closed, this way you can make sure nothing is rubbing against the hood. First start with the brackets that are attached to the body panel. Just drill small holes through polycarbon and the bracket so that they match. Then screw those two in. I used counter sunk screws so that it is flushed. Open the hood. The brackets on the hood side are bit more wobbly so make sure to hold them well when you drilling and screwing. Last 2 are long screws in front. This you will drill through the polycarbon and then to the steel so have a good dill bit. Screw those in till the polycarbon is flushed with the bumper or just below.
Now for practical purposes, you are done; the next part is what I have done for cosmetic purposes.
|
click to enlarge |
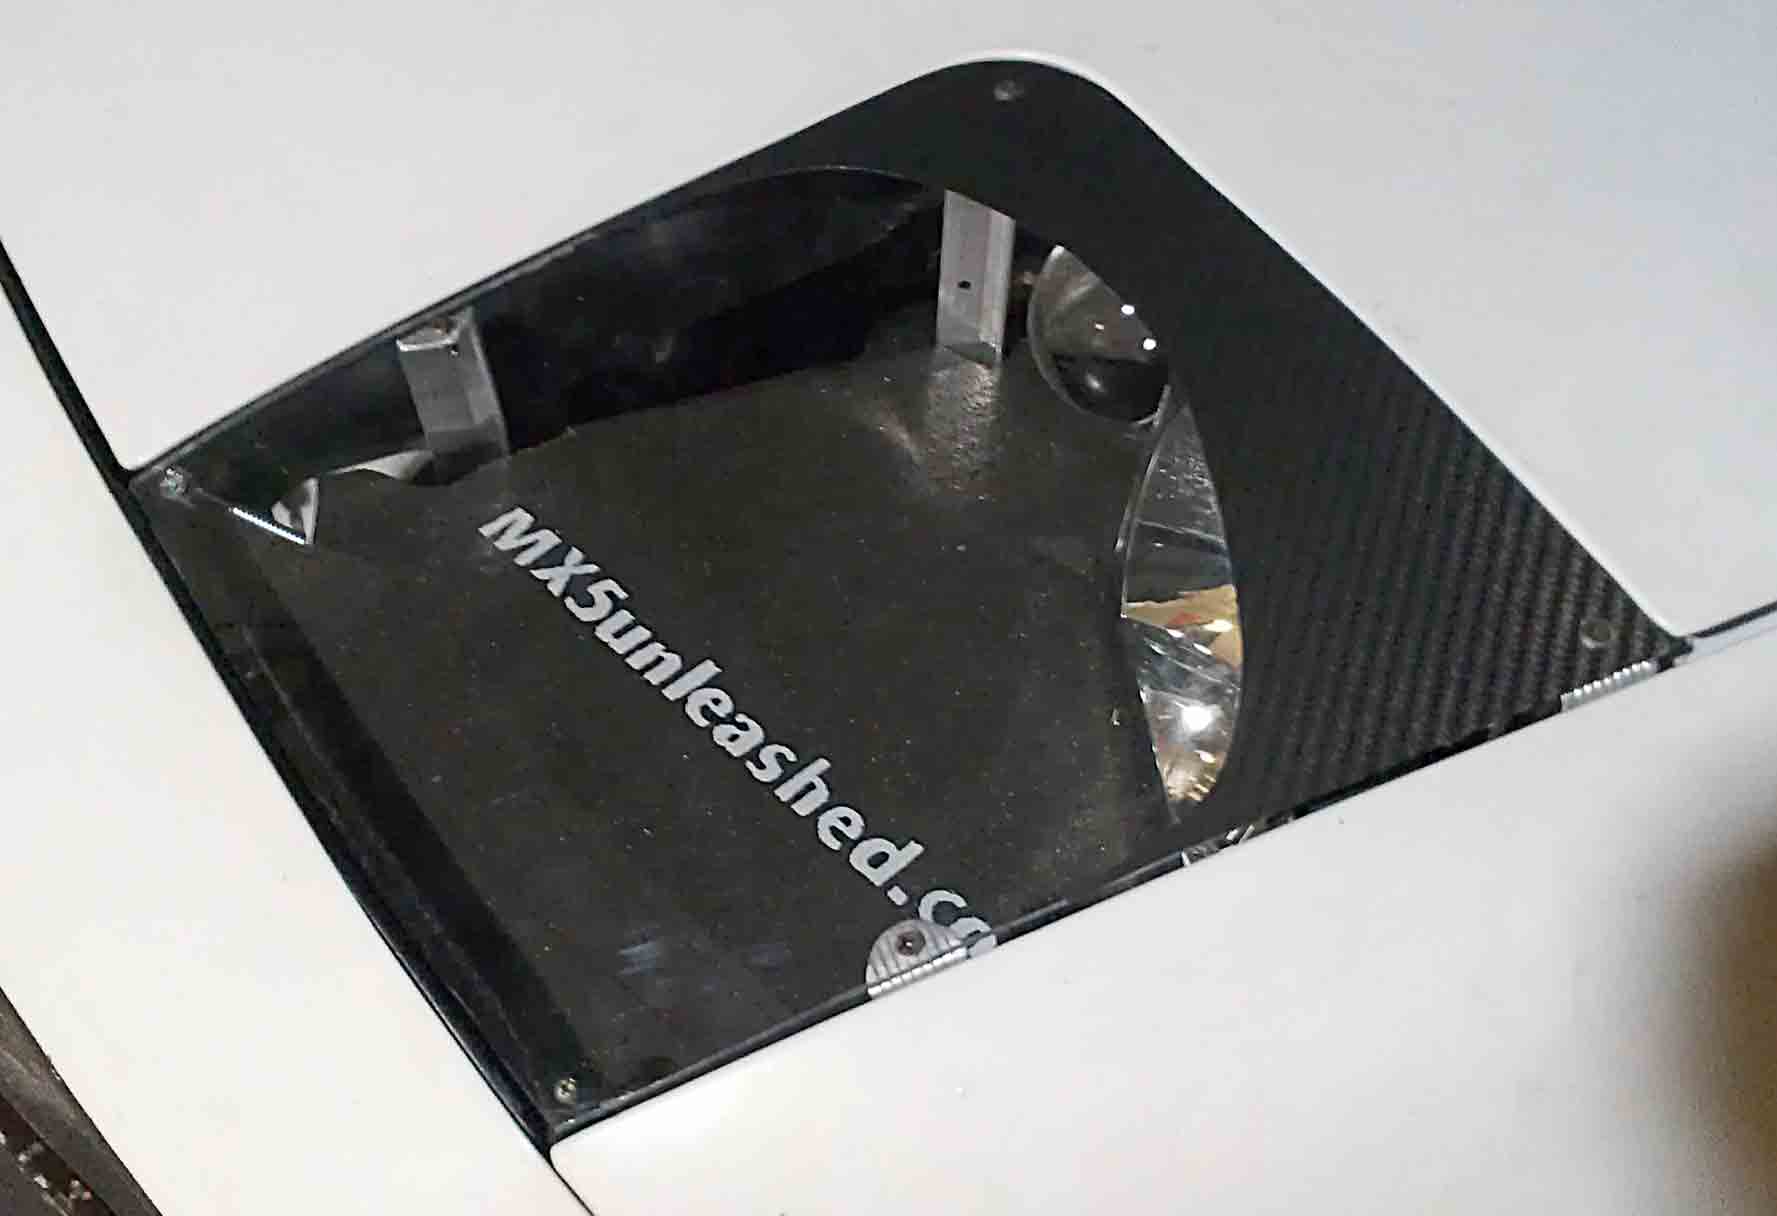
On the bottom I just made a cover with cardboard and fiberglass resin then painted with some texture paint for look.
And on the top I put carbon fiber looking vinyl, which then proceeded to bubble up, probably due to heat from the lights or my lack of ability to lay vinyl. It will be stripped and I will just paint it in the shape you see.
Please if you make a projector light conversion by following those directions, share it with us your versions of this on our facebook page. Thanks a lot!
www.facebook.com/MX5unleashed |
click to enlarge |
click to enlarge |
|